

Placeholders: Finale
 Document Variables have occupied this space for several months of this year:
- We started 2024 with Placeholders: Introduction to Document Variables
- In February, it was Placeholders: Title as a Document Variable
- Then, we had Placeholders: Label, Status, Keywords and Synopsis
- Then Placeholders: Statistics as a Document Variable
- And Placeholders: Date/Time as a Document Variable
We have two loose ends to tidy up before we can draw a line under Document Variables.
Then, so we can also draw a line under Placeholders generally, let’s include three items under Comments, Footnotes and Layout …
… one under Images and Text …
… and four under Miscellaneous.
Placeholders: Finale
Alphabetically, let’s tick these final few tag words off our list.
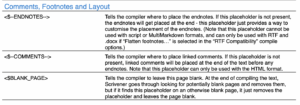
Blank pages: <$BLANK_PAGE>
Scrivener, during compile, (in case you included some additional carriage returns by accident and they pushed the non-existent text onto the next page which would then be blank, in an attempt to be helpful) eliminates material which might create an unwanted/unexpected blank page.
But, if you want a blank page, rather than hitting return loads of time (which won’t work!), this placeholder will ensure you do get that blank page where you want it. Put it on an otherwise blank document and Scrivener will not output the placeholder itself, but a blank page instead.
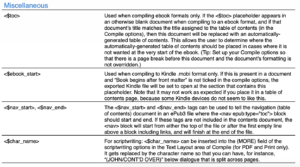
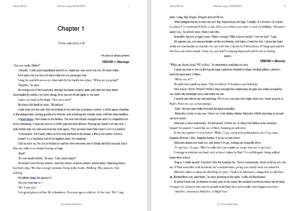
Character name: <$char_name>
This placeholder has restricted use. In scriptwriting, it can be inserted in the (MORE) field, provided the output is to PDF or print. (Access the drop down box by clicking on Options.)
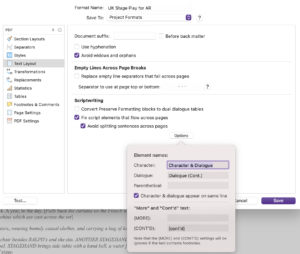
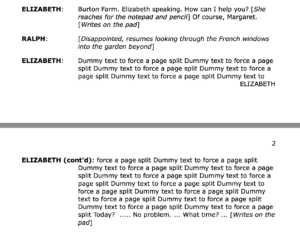
If you enter <char_name> into that MORE field, instead of just “cont’d” being used, the character name whose dialogue is interrupted will be given as well. However, to make this work, you also need to untick the box ‘Avoid splitting sentences across pages’. And I added dummy text also as my characters rarely have long tracts of dialogue. But, this is what it looks like, if you manage it!
Comments: <$–COMMENTS–>
This is one of two placeholders which affect positioning of material. The other is <$–ENDNOTES–>.
If you don’t use this placeholder, linked comments are placed at the end of your manuscript, just before any endnotes.
Providing you are outputting to HTML, there is an option to use this placeholder to position the comments elsewhere.
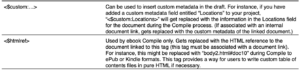
Custom: <$custom: ….>
Scrivener offers the option for you to set up custom metadata and choose names for such metadata. See Inspector skills: Metadata.
This placeholder provides the option to output whatever custom metadata you’ve set up when you compile.
The tag word starts with <$custom: and you just specify the name you chose after the colon. Easy?
By way of an example, in my novel Dead Wood, I have a custom metadata field called Theme.
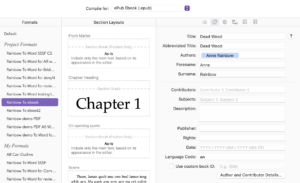
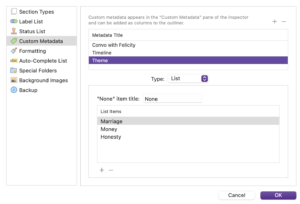 If I’d like the theme being addressed in each scene to be output when I compile, I can include the placeholder <$custom:Theme> as a prefix. I’ve right aligned and emboldened mine, so it stands out better.
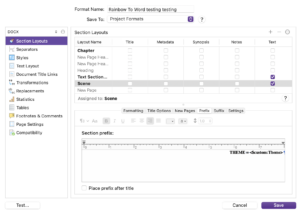
This is how that setting affects the Section Layout for my scenes.
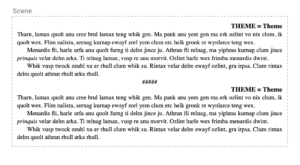
And this is an example of the compiled output.
This output of metadata would be appropriate for compilations done just for me during my editing/reviewing stages (and maybe my beta readers) but I’d set up a different Project Format for the final output (for publication) in which none of the metadata would be shared.
Ebook start: <$ebook_start>
This placeholder has restricted use:
- Only relevant when compiling to .mobi format
- Won’t work if you’ve not ticked the ‘Book begins after front matter’ box
- Might not work (as expected!) if placed in the table of contents
If it works, the result is that the Ebook will open wherever you’ve put this placeholder …
Endnotes: <$–ENDNOTES–>
This is one of two placeholders which affect positioning of material. The other is <$–COMMENTS–>.
If you don’t use this placeholder, endnotes are placed at the very end of your manuscript. (They are called END notes!)
Provided you are outputting to RTF or .doc, you can, however, use this placeholder to output, for example, endnotes at the end of each chapter.
HTML reference: <$htmlref>
For the uninitiated, HTML stands for hypertext markup language. It’s a language of codes (like our placeholders) that start with < and end with >, and between those two brackets, coding provides the instruction for output. If coding is not your bag … step away from the screen now!
Here’s an example of HTML. It’s the code which controls the formatting of the previous section on Endnotes.
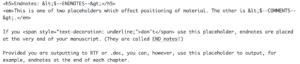
HTML tends to happen in pairs.
- See the <h5> and </h5> codes either side of the heading? That signifies I used Heading level 5.
- See the <em> and </em> pair either side of text I emphasized (using italic).
- See the <span> and </span>pair either side of my underlined word.
The HTML placeholder provides a way for users to write a custom table of contents in pure HTML, should they so wish. You don’t need to know too much HTML though and there are other (maybe simpler?) ways of creating a table of contents; see this blogpost.
However, if you decide you want to use this placeholder, note the restrictions:
- It’s only used for ebook compiles.
- It gets replaced by a reference to a document (and for this to work, you need to have linked the document to the tag).
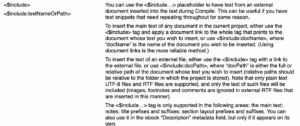
Include: <$include> <$include:textNameOfPath>
The <$include> placeholder allows you to pull in some additional text during compile. This is material that’s not within your Scrivener project but external to that file.
Why might you want to do this?
- If there’s material which you want in your compiled version, but this material is dynamic (ie it might be changed from one moment to the next), using this placeholder allows you to pull in the most up-to-date version of the text.
- There might be material you want repeated a number of times. Using the <$include> placeholder will result in a smaller project size as the material is a) stored elsewhere and b) only the placeholder is repeated.
Using this placeholder has a number of restrictions/caveats.
- Using the linked version of the placeholder is considered (by L&L) to be the most reliable method.
- Only plain text UTF-8 and RTF files are supported.
- If the file includes any images, footnotes or comments, these will be ignored.
- This placeholder may be used in your main text, notes, title prefixes/suffixes, section layout prefixes/suffixes.
- If you use it in the ebook ‘Description’ metadata field, which is commonly used to store the marketing blurb, nothing else can appear alongside it. (See the Scrivener Manual page 582 for more details of ebook metadata.)
Navigation start/end: <$nav_start> <$nav_end>
These placeholders can be used to tweak the navigation from your table of contents to the various blocks of text in your ebook.
I can offer nothing over what the List of all Placeholders says!
Table of contents: <$toc>
This placeholder allows you to decide where the Table of Contents will appear within your ebook, and for Scrivener to automatically generate the table for you. There are a few ‘rules’.
- This only works for ebooks.
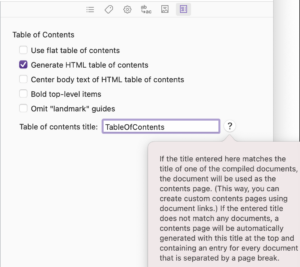
- The <$toc> must appear in an otherwise blank document. I’d suggest you call it ‘TableOfContents’.
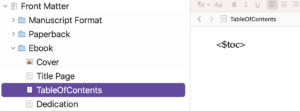
- The title of that document must match that assigned in the compile options.
- It’s recommended you set up the compile options so that there’s a page break before your TOC document.
- Also, you need to make sure that document’s formatting is not overridden.
That’s it folks!
I’m done with placeholders and the next series of blogs will be all about ‘overcoming editing overwhelm’ – using Scrivener.
Questions about Scrivener?
Need a helping hand with placeholders?
Want a demo? Book a Simply Scrivener Special session at a time to suit you.
And, if you need a steer on self-editing,
check out my RedPen Editing courses.
Join RedPen Editing for a free 5-day editing taster course.
Did you notice?
No adverts.
An uninterrupted read.
To thank me for posting this blog
and helping you, you could always
buy me a virtual cup of coffee!

The ScrivenerVirgin blog is a journey of discovery
To subscribe to this blog, a step-by-step exploration
of how Scrivener can change how a writer writes, click here.
Also … check out the Scrivener Tips
on my ScrivenerVirgin Facebook page.
Not yet using Scrivener?
Click here to download your free trial.

No Comments