NaNoWriMo2016: Project keywords as metadata
Project keywords provide another way of recording metadata.
As a reminder:
- I’ve renamed Label as Location – so I know where each scene takes place.
- Not changed Status – it will prove useful when I start to edit.
- I’ve set up custom metadata for POV – see the blog post on 16 October.
Now, I’m going to use project keywords to record who appears within each scene, and then consider other options for other useful project keywords.
Setting up project keywords
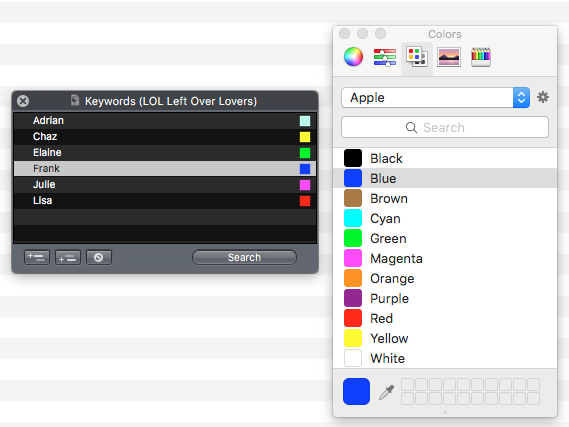
![]() Project keywords, as the name implies, apply to the whole project. To view the current project keywords or to add your own, select Project / Show Project Keywords – or click on the Keywords icon in the main menu.
Project keywords, as the name implies, apply to the whole project. To view the current project keywords or to add your own, select Project / Show Project Keywords – or click on the Keywords icon in the main menu.
Use the + button to add an extra entry. They will be listed alphabetically.
You can choose your own colours. Simply double-click on the coloured square.
Assigning keywords to a document
In the Inspector, select the Keywords option from the top menu (the key icon) and then click on the cog wheel to the right of the Keywords menu to open the drop-down menu for the project keywords.
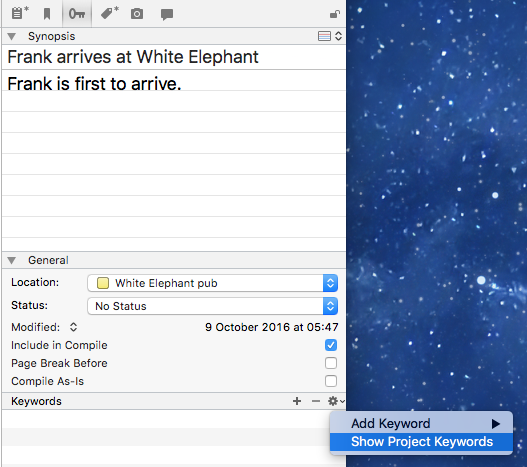
If you have not already set up the project keyword you want to use, you have the option of doing it now. 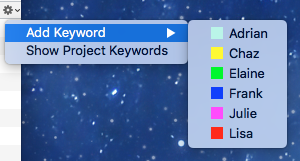 Select Show Project Keywords and you’ll be presented with the Keywords dialogue box.
If you have already set up your project keywords, select Add Keyword and make your choice.
 Viewing project keywords on the Outliner
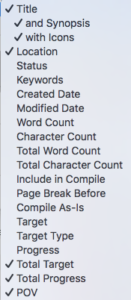
Keywords is already an option for the Outliner view; so, to have it visible, just tick that option.
Scrivener places the Keywords column at the right-hand end, but you can drag this column to reposition it. I’ve placed mine to the right of the Location column.
In the Outliner view, the keywords are underlined in the chosen colour. At the same time, if you have the Inspector open, the keywords are listed in the Keywords section alongside their blocks of colour.
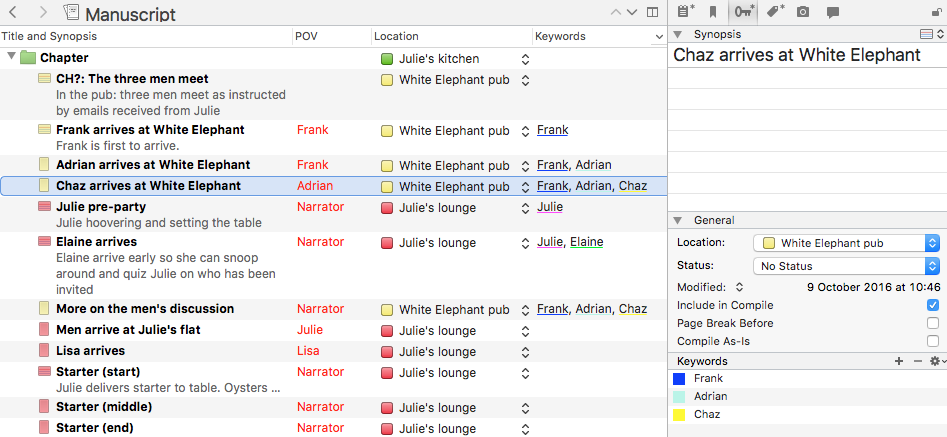
Notice that, in the Project keywords dialogue box, and in the menu for adding a keyword, the keywords are listed alphabetically.
The order in the Inspector and the Outliner view depends on the order in which you added them. If you want to reorder the keywords, in the Inspector, simply drag the coloured square to reposition each item to create the order that makes best sense to you.
How useful is this metadata option?
 Very … and it’s incredibly flexible.
As well as character names like I’ve used, you could assign keywords that denote a theme. This is especially useful if you are unlikely to include that particular word within the text.
For example, much of my story hinges on previous relationships, all of which went wrong for the individuals at Julie’s party. During the discussion over dinner, each character’s backstory is revealed, and this results in others reviewing their opinion of that character.
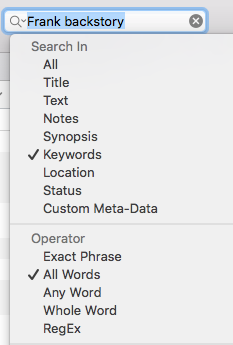
If I want to track how Frank’s story unfolds, I might perform a Keyword search on ‘Frank’ and ‘backstory’ requiring both words to be assigned to every scene where Frank is present and his backstory is revealed.
Since all six characters have a backstory, and it’s quite possible that some backstory might be revealed while a character is not present, I’d need six different keywords: one for each of them. Then I’d search on (say) ‘Fbackstory’ to track how others find out about Frank’s past.
Questions? Need a helping hand? Want a demo?
To watch me go through the process of outlining a novel or to ask any questions, book a Simply Scrivener Special.
To help me to prepare, you could also complete this short questionnaire.
The ScrivenerVirgin blog is a journey of discovery:
a step-by-step exploration of how Scrivener can change how a writer writes.
To subscribe to this blog, click here.
Also … check out the Scrivener and RedPen Editing Tips
on my ScrivenerVirgin Facebook page.


No Comments