Colour me rainbow
The current rage – I’m told – is adult colouring books. I’m sure they provide hours of inspiring, magical enjoyment.
I don’t have time for such distractions … I’m busy preparing for NaNoWriMo, but there’s no need to go without the colour fix!
Scrivener provides another (more useful?) way of having fun with colour and this post is all about what I’ve done so far.
You will recall that I decided (as a challenge to myself …) to write in three voices.
- First person for the narration by Sally AKA CatAmongThePigeons who is searching for her real father
- Second person for the commentary on the Safari Supper courses given by ComeDieWithMe
- Third person for everything else
I’m going to use the Label field to colour code the choice of voice. This will remind me to use the right voice for such scenes!
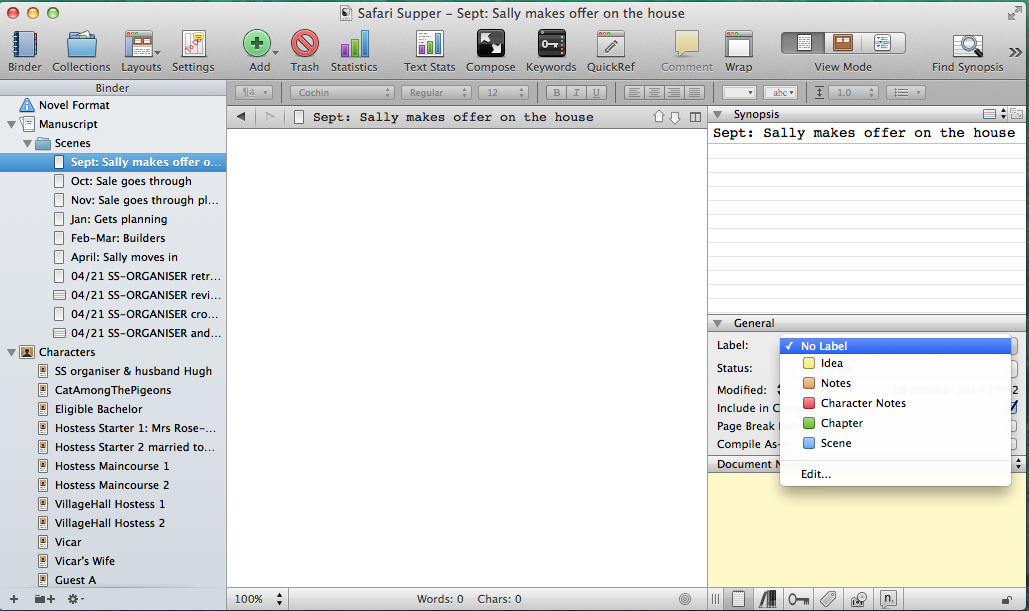
I open the Inspector (by clicking on the circle with an i in it) and then click on the arrows to the right of the Label box.
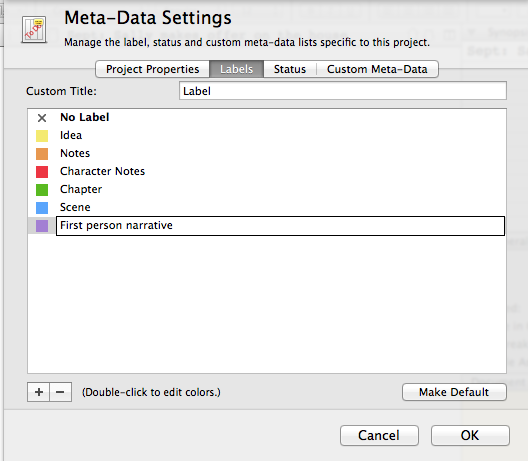
Choose Edit… and am then presented with the colours set up so far for categories that writers might like to use. Click on the + sign (bottom left of the dialogue box) and am offered a purple colour which I immediately like. To me, the colour purple represents integrity and, since my first person narrative is for Sally, a character who has bucket loads of integrity, this is a perfect fit. I enter the label ‘First person narrative’.
Hit Enter and I click + again, and call this one ‘Second person narrative’.
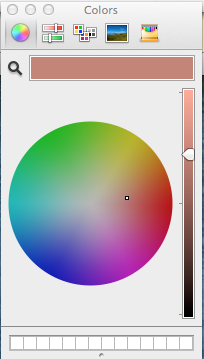
I don’t warm to the colour (a sludgy brown) so I double click on the brown square to open the colour option box.
The small dot within the circle shows the colour selected at the moment and the bars above the circle and to the right show the current colour choice. I could drag the arrow on the right-hand bar to lighten or darken the colour, but I want something completely different.
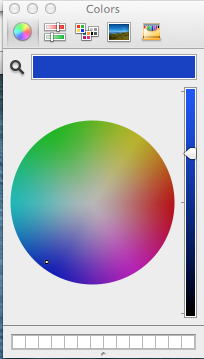 By dragging the small dot, I can choose a colour I prefer.
I decide on a very dark blue for my sarcastic narrator, ComeDieWithMe. Draged the white dot to that position and then close the dialogue box. Clicked OK and my two colours are now set up.
For the first few scenes – all of which will be from Sally’s POV, I assign the ‘First person narrative’ label to them all.
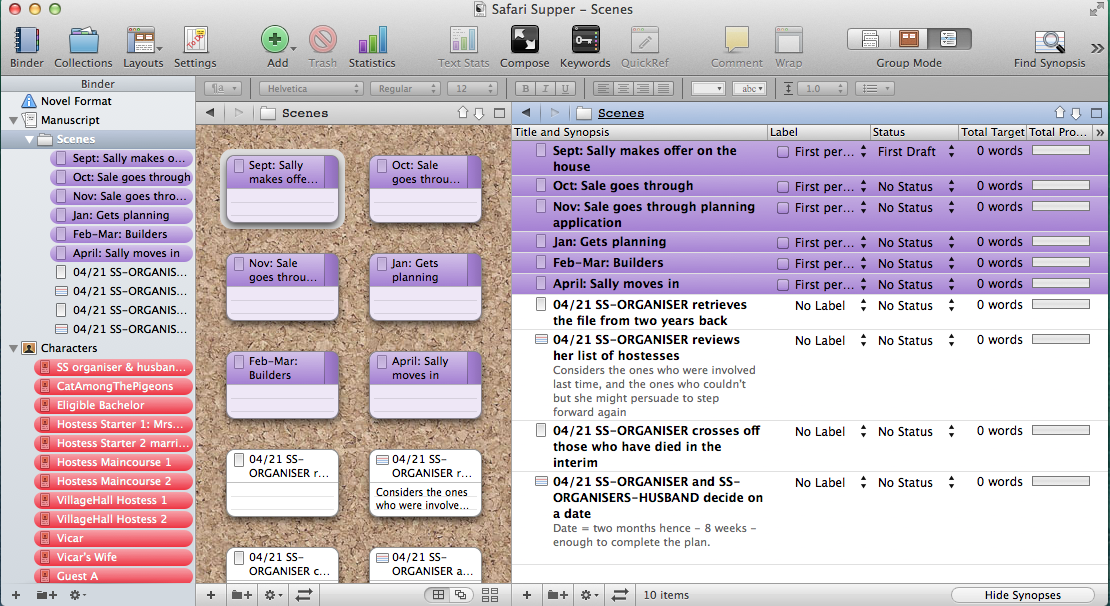
The menu option, View / Use Label Colour In, then allows me to display my chosen colours in the Binder, as Icons, as tabs on the Index Cards in the Corkboard display, and in the rows of the Outliner display.
I’ve gone totally over the top with my colouring, applying it to everything, and even added the red Character label to my character sketches.
The screen grab above shows both the Corkboard display. Which I mentioned in a previous post and the Outline view. It gives an overview of words for each scene (none at present!).
Notice the Status column. For the duration of NANO, all my scenes will be the First Draft, so I’m not going to bother labeling them all. During the editing process, I can relabel these, eg, as ‘Revised Draft’ or ‘Final Draft’.
Bearing in mind that Scrivener gives me the freedom to write any scene in any order.
I’ll also have the option to edit them in any order that suits me. For example, I might want to focus on one character and edit every scene in which they appear. To make sure I have perfected their dialogue. The Outline view lets me identify all of Sally’s scenes; they are all purple.
There’s also the option to Search eg on a character’s name. But I’ll leave that for another day!
How are you getting on with your preparation for NANO? Only one sleep to go!
The ScrivenerVirgin blog is a journey of discovery:
a step-by-step exploration of how Scrivener can change how a writer writes.
To subscribe to this blog, click here.
Also … check out the Scrivener Tips
on my ScrivenerVirgin Facebook page.


No Comments