NaNoWriMo2016: Custom metadata
The Label and Status options within the Inspector are valuable for metadata. But if you need more, you’ll need to set up custom metadata.
I’ve used Label for Location and am keeping Status for the progress of any scene. As well as this, I want to keep track of who has the POV (point of view) in each scene, plus who is present in each scene – and to access this data easily onscreen.
Scrivener to the rescue!
There are two options: custom metadata (this blog post) and keywords (next blog post).
Custom metadata
Custom data provides a flexible tool to record whatever you want to record about a particular document.
In an example provided by Literature & Latte, each document is a recipe, and the custom metadata relates to the source of the recipe, who recommended it, the calories per serving, etc.
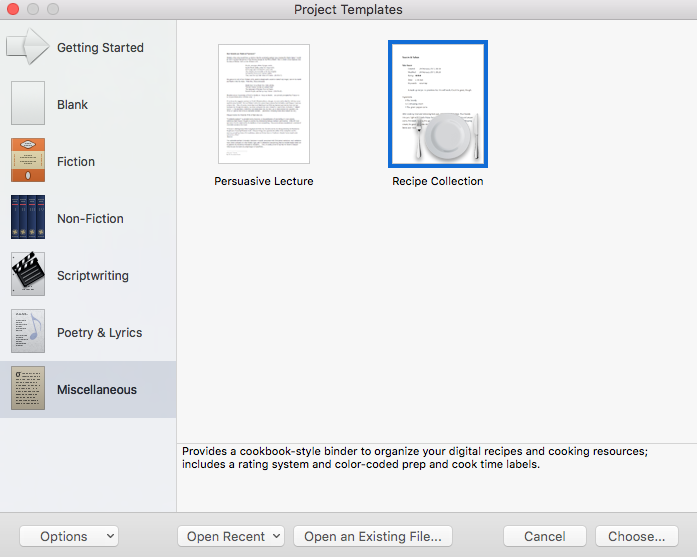
For me, each document represents a single scene and, in my LOL Left Over Lovers novel, I’ve decided to use the custom metadata feature to record my POV character.
To set this up, I selected Project / Meta-Data Settings and used the + sign to add a new category.
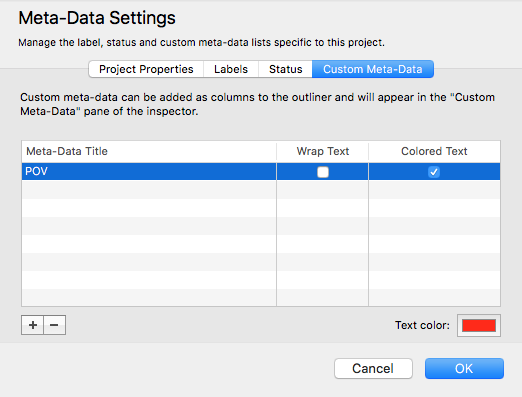 My POV is a single word, so I haven’t selected Wrap Text but I opted for coloured text. The default colour is red; if you click on the block of red, you can choose whatever colour you like.
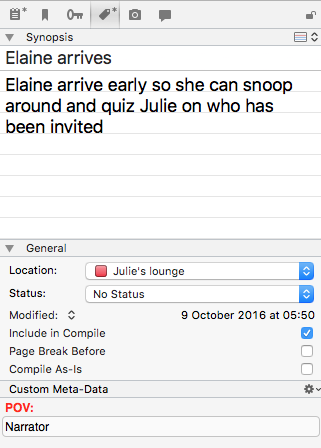
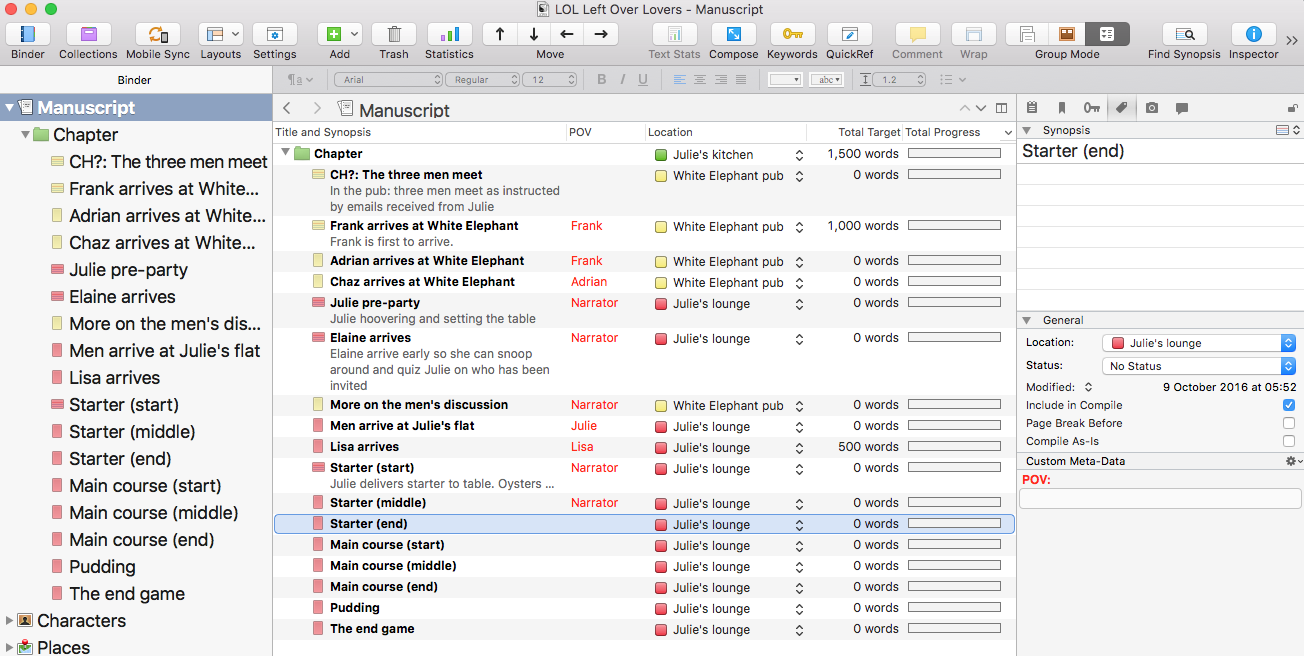
To record the POV for a single document from within that document, click on the ‘tag’ icon at the top of the Inspector pane. POV is then revealed as a Custom Meta-Data item, with space to type in who has the POV for this scene. In this scene, it’s the narrator – someone not presents but viewing the proceedings and relating them to the reader.
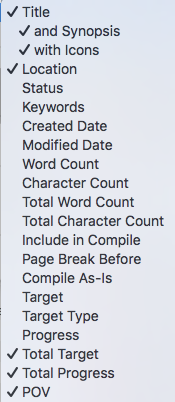 I can also record the POV within the Outliner view, but first need to make the POV column visible.
If you right-click within the header of the outliner pane, this drop-down menu appears. Tick the columns that you want to include, and untick those you want to hide. I’ve unticked Status as I don’t need to see this data until after the first draft has been written.
The same list of columns can be revealed if you select View / Outliner Columns.
When I highlight my Manuscript in the Binder and opt for Outliner view, the POV column is now visible.
Notice that I have moved this column, by dragging it from the right-hand end to just before Location.
Then, selecting just one row, I can enter the data for POV within the outliner, or within the Inspector, for that particular scene.
How useful is this metadata option?
Very …
While I am writing, if I am aiming for alternating POVs, I can see whether maybe I need an extra scene allowing a different character to be given the POV, so as to break up a sequence of scenes already allocated to another character.
Once I’ve written my draft when it comes to editing, I can use this custom metadata field to help me to select and focus on just those scenes, for example, from Frank’s POV.
Next time, I’ll explain how I use the keyword metadata option.
Questions? Need a helping hand? Want a demo?
To watch me go through the process of outlining a novel or to ask any questions, book a Simply Scrivener Special.
To help me to prepare, you could also complete this short questionnaire.
The ScrivenerVirgin blog is a journey of discovery:
a step-by-step exploration of how Scrivener can change how a writer writes.
To subscribe to this blog, click here.
Also … check out the Scrivener and RedPen Editing Tips
on my ScrivenerVirgin Facebook page.


No Comments