
Metadata: The editor’s friend
Metadata – The editor’s friend!
Metadata becomes essential at the editing stage but, for many writers, after Compile, Metadata is the Scrivener feature which is powerful and yet – for some – daunting. I think that’s because there are so many options to consider!
Let’s do it …
What is metadata?
 Metadata is data about data – and offers a way of documenting your manuscript.
Ideally, you set up the metadata when you write your novel since, faced with self-editing your text, it will help enormously if you have already identified important information.
If/when you send it to an editor, he/she will certainly need to know what’s where, and why, within your novel.
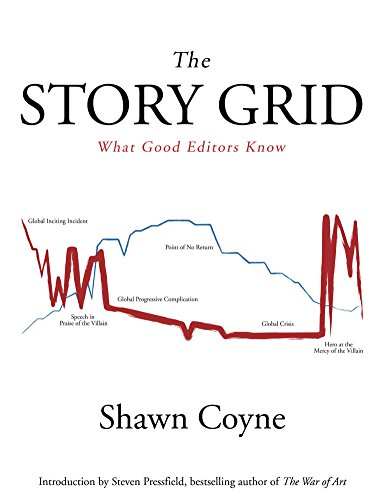
Shawn Coyne shares his method of editing in The Story Grid.
Here, I share how I use Scrivener – and metadata especially – to document my novels.
Why should you want to use Scrivener’s metadata feature?
Working on a novel, the manuscript should be broken into scenes, with one document per scene … because, if for no other reason, metadata is applied scene by scene.
Then, for each scene, some (or all!) of this data could be important to record:
- What happened in this scene – describing the event
- The value shift: what changes occur in the each character’s standpoint?
- The polarity shift: in what direction is this scene taking the story? Negative to positive? Positive to negative?
- The turning point: where, in this scene, does the story turn?
- How many of your cast are involved in this scene?
- Which characters appear (speak/act) in this scene?
- Who has the POV?
- Which characters are not present, but get a mention in this scene?
- When does this scene happen? And over what time period?
- Where does this scene happen? What is its location?
- Word count
All this? Really?
Yes! Check out how JK Rowling and other famous writers like Sylvia Plath planned their novels here. Their analyses were on paper; you have Scrivener …
What to record, and where?
You don’t have to record everything! But, you will make life easier at the editing stage if, when you are planning your novel, you record some of the metadata. And/or when the first draft is complete, you’ll maybe go back through your text and add more documentation.
For some of the 11 items, Scrivener provides ‘obvious’ places to record the data.
- The cards – the ones you see in Corkboard view – can be used to record items 1-4. And this is all part of the outlining process.
- Number 11 – word count – is provided automatically and appears at the bottom of a document, but you can also set targets and see your progress on the Outline view.
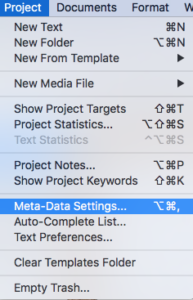 For 5-10, the metadata options are the obvious documentation solution, and it’s up to you to decide what to use for which!
How to set up metadata in Scrivener
When you select Project / Meta-Data Settings, the pane has four tabs:
- Project Properties
- Label
- Status
- Custom Meta-Data
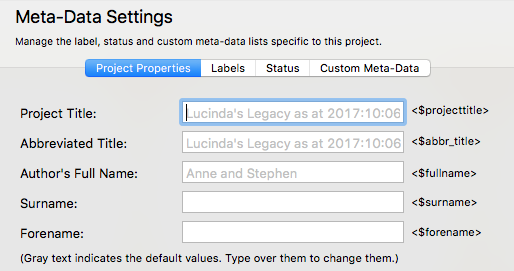
Each pane deserves a look, but you don’t have to change anything, if you are happy with the defaults offered.
Project Properties
The Project Properties pane provide a way of specifying data – using tags – which result in consistent information being displayed. Scrivener (as always) provides defaults, and it wouldn’t be the end of the world if you left them as they are.
- For the Project Title and the Abbreviated Title, the filename is used.
- For the author’s name: the username assigned to your computer is the default.
I’ll change all three!
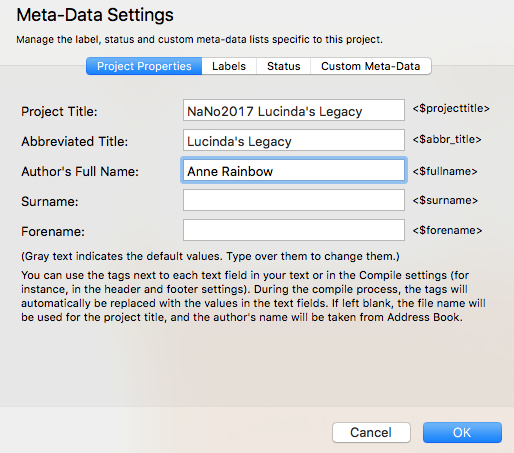
Notice the option to include this metadata using the tags listed to the right … especially for setting headers/footers. This will be useful when it’s time to edit the manuscript / ask for feedback.
 Using Labels, Status and Custom Meta-Data
Now, when it comes to deciding what feature to use for items 5 through 10, much depends on how you are writing your manuscript.
- The number of characters involved in a scene might not seem important, but think about your reader. Having some scenes with very few characters, interspersed with some which you might call ‘crowd scenes’, will result in a varied diet for the reader. And that’s a good idea!
- Identifying which characters are present, plus those who get a mention will provide a way of tracking each individual’s route through the manuscript. Using Search with Save Search As collection, you can view only those scenes which are relevant to a character. This assumes that you refer to the character by name at least once in a scene …
- If you only have one POV throughout, then there’s no need to record this. If you decide you need two (or more!), this information is a prime candidate for applying to one of the metadata options.
- Time – when things happen and over what period – is also usually relevant. How you tackle this depends on how you decide to present your story. If it’s linear (starts at the beginning and progresses through to the end), maybe just a timeline in your Research folder will suffice. If it’s not linear, then maybe you need some way of ‘seeing’ which scenes relate to which time periods. Metadata, together with colour coding, can provide this insight.
- Location … again it depends on how many locations are involved and whether you mention them by name at least once in every scene.
Lots of possibilities. Lots of decisions to make. Luckily, with Scrivener, there are also lots of options!
The Label option
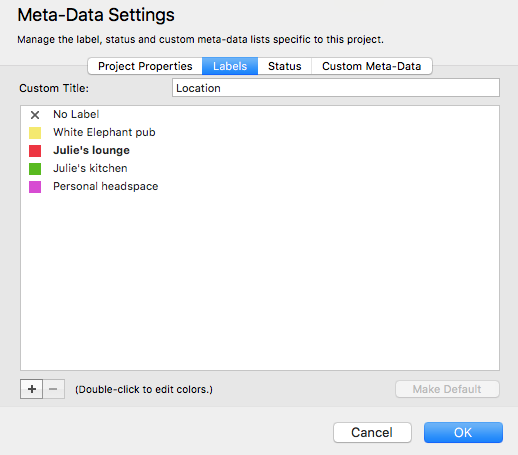
The Label feature comes with a colour coding option, so this is ideal for any aspect of your story which you’d like to see ‘at a glance’.
In my book review of I SEE YOU by Clare Mackintosh – which was delivered as part of a RedPen Training session – I used the Label feature for POV. I made this decision because Clare uses three, and I wanted to see how they were fitted together, what ‘pattern’ her chapters made.
- Red shows the oh-oh sections, written in 2nd person by the villain.
- Blue shows ZOE’s POV (1st-person, present).
- Green shows the 3rd-person chapters which told the story of the police investigation.
In another NaNo novel – LOL Left-over Lovers – I used the Label option for Location. I made this decision because the action went back and forth between three locations – or the text was within the headspace for particular individuals.
The Status option
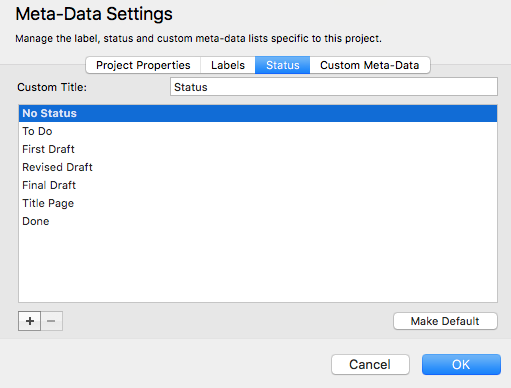 The Status option is usually used to record writing progress – and then editing progress.
But it can be used for other purposes if you wish. And, there are icons you can apply to documents – and chapters – so you could keep track of progress using them instead.
Custom metadata
This option provides the most flexibility! I explain how here.
And, if that’s not enough, we also have project keywords!
Questions? Need a helping hand? Want a demo?
To watch me go through the process of outlining a novel or to ask any questions, book a Simply Scrivener Special.
To help me to prepare, you could also complete this short questionnaire.
The ScrivenerVirgin blog is a journey of discovery:
a step-by-step exploration of how Scrivener can change how a writer writes.
To subscribe to this blog, click here.
Also … check out the Scrivener and RedPen Editing Tips
on my ScrivenerVirgin Facebook page.


No Comments