
Starting a new novel using Scrivener
 September – time to start a new novel
Starting a new novel happens, for me, about this time every year, in preparation for a writing splurge during NaNoWriMo.
This blog post takes you through the initial process.
- Setting up a new project
- Reviewing the project metadata
- Creating character sketches
- Creating location sketches
- Identifying the story timeline
Subsequent blog posts will show the preparation done ahead of midnight on 31 October, when I start writing the manuscript.
Setting up a new project
Select File / New Project. I’m writing a novel, so I choose Fiction from the list on the left. Then, since this novel going to be simple, I choose the Novel template.
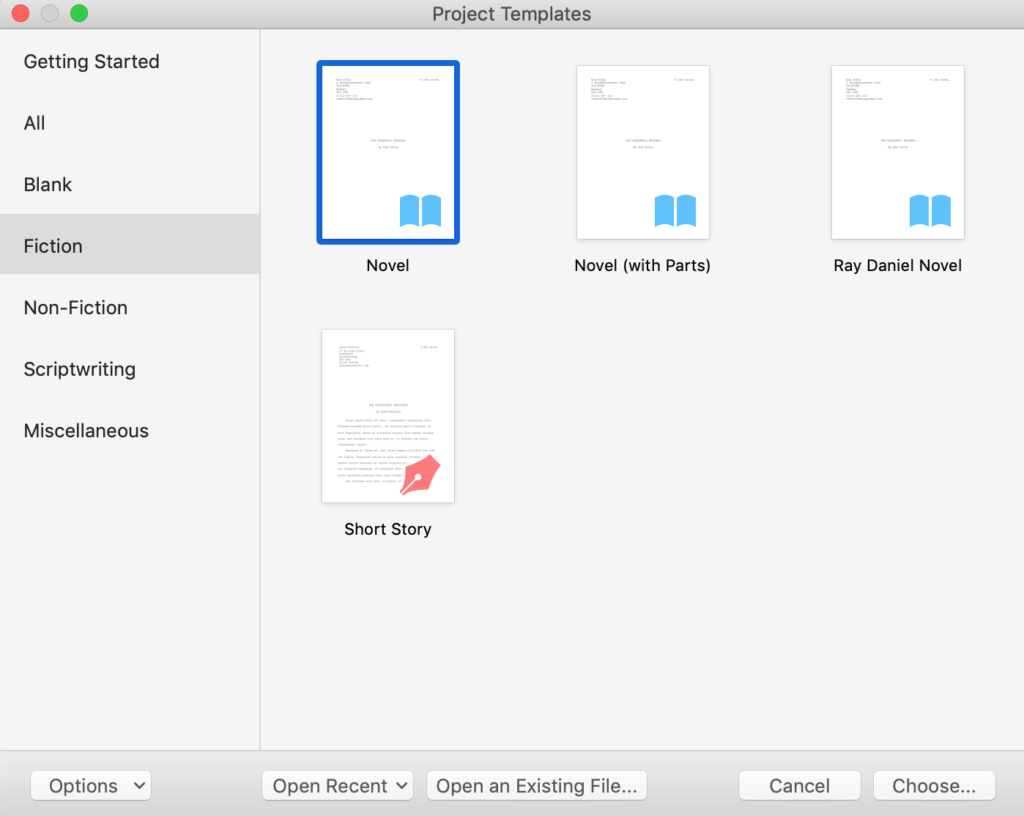 I’m calling my 2019 novel The Golden Girls.
I’ve already set up a new folder in my NANO folder for 2019, and save the new Scrivener project file within that.

This novel will (eventually) become the fourth and (probably) final novel in a series, the other three being the novels I began during NaNoWriMo in 2012, 2017 and 2108. I have them all, ready for reading/action, on my laptop.
Project metadata
Having saved the project file, Scrivener has created the project metadata automatically and this can be seen via File / Compile. Click on the icon that looks like a luggage label.
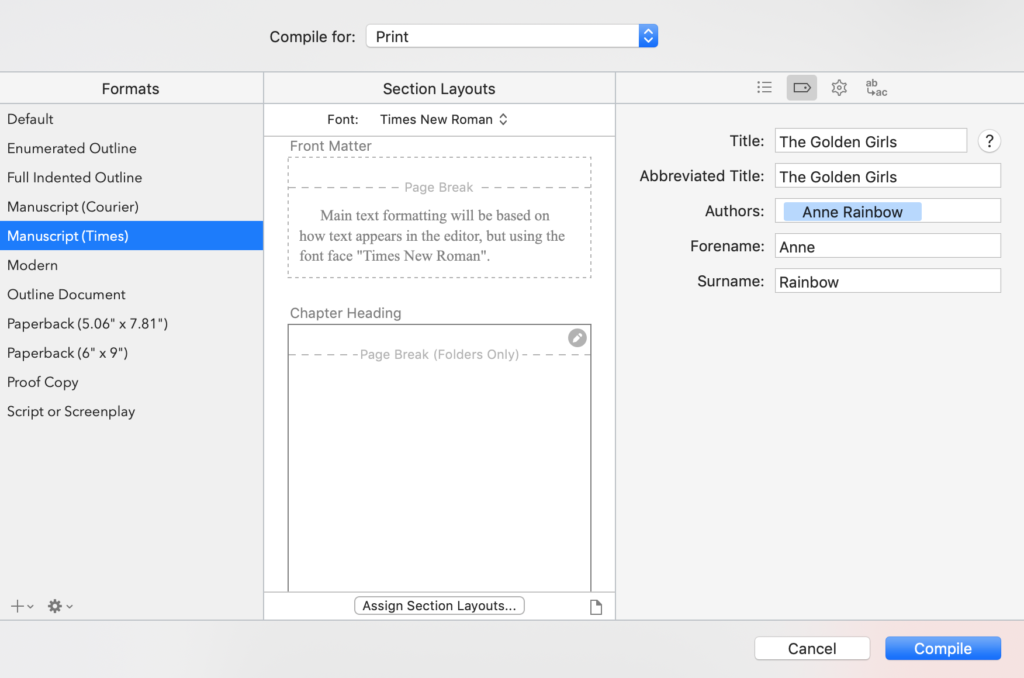
This information is used during Compile eg for the title page. If, later, I decide to change the novel name, I will need to alter the entries here.
Cast of characters
The Golden Girls has the three main characters, one from each of the three books leading up to this one: Audrey, Lucinda and Helen.
Rather than type in their character sketches afresh, I arrange two projects (one old and my new one) in separate windows on my screen … and drag the character sketches from project file to project file. Simple!
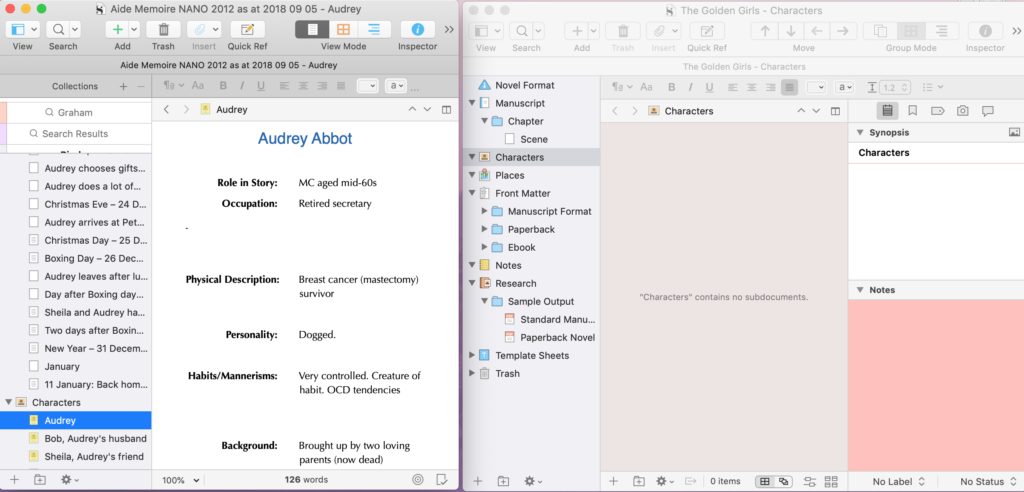
By 2019, I had begun to structure my character sketches, so when I drag Helen’s character sketch into place in my new project, along with her comes information about her closest relatives.
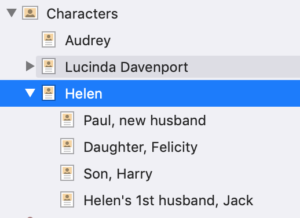
That’s okay. It will serve to remind me of these relationships, even if these characters do not appear in the new novel. I can delete them later if they distract me too much!
More characters will appear in due course. Each ‘golden girl’ will have a cabin steward, and there will be dinner companions, cruise staff and entertainers, love interests, etc. I have yet to discover these ‘extras’ but can add them easily, later.
Novel location
My novel is set on a cruise ship. That much I know.
I’ve also decided that the cruise, with Audrey, Lucinda and Helen onboard, will sails from, and back to, Southampton, in the UK. This trip features already in Aide Memoire, and is also mentioned in Dead Wood. I will need to revisit those two novels to make sure I am consistent … and find a way of slipping it into Lucinda’s Legacy too … but will have fun planning this cruise for my newest novel.
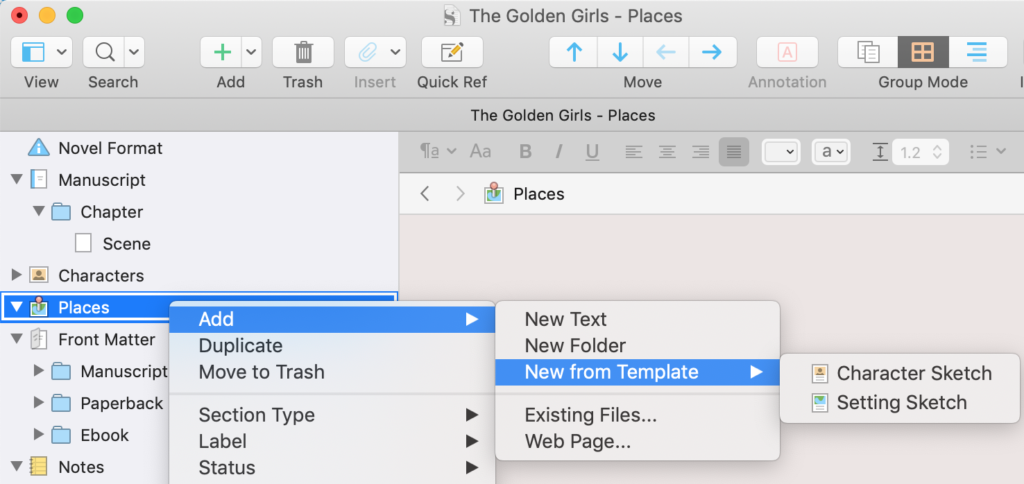
I set up a new location by right clicking on the Places folder and selecting Add / New From Template / Setting Sketch.
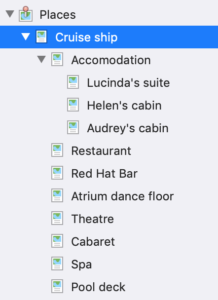 Having set up a document for the Cruise ship, I add additional locations: the accommodation and places where my golden girls might meet each other.
I have been on a couple of cruises, both on large vessels, so I am aware of the usual facilities on board. I might or might not have an opportunity to experience such an adventure again for myself between now and when these four books might be published. However, I will research such travel opportunities on the Internet – enough to ensure my first draft is plausible and rings true for any reader who has experienced such cruises for themselves.
I’ll explain where I keep my research notes in the next blog post.
Story timeline
The cruise has a finite duration and I’ve decided to make that the duration of the novel. To help me to keep my scenes in chronological order, I’ll need a timeline.
There are third-party products offering this feature, but I’m going to use Scrivener’s keyword option to store this metadata, and the Outliner to view the scenes, in date order.
I’ll explain how to create the date metadata, and much more, in the next posting.
Starting your own novel? Need a helping hand?
To watch me go through the process of setting up a new novel or to ask any questions, book a Simply Scrivener Special.
To help me to prepare for the webinar, you could also complete this short questionnaire.
The ScrivenerVirgin blog is a journey of discovery:
a step-by-step exploration of how Scrivener can change how a writer writes.
To subscribe to this blog, click here.
Also … check out the Scrivener Tips
on my ScrivenerVirgin Facebook page.


Sarah
23 January 2022 at 18:43I’ve been using scrivener for years and only today, when I saw this post, realized I could nest locations and characters. Thanks!
Anne Rainbow
23 January 2022 at 18:46Enjoy!
Jo Lewis
31 December 2020 at 05:25I do not have an Apple Mac, is this ok for me to use?
Anne Rainbow
31 December 2020 at 07:54There is a version of Scrivener for Windows. My screen grabs will be different from yours but the concepts are the same. Right now, Windows users are waiting on the release of Scrivener 3 for windows, and I’m hoping Literature & Latte will also release a series of videos then which take Windows users through all the features that are so well documented for Apple Mac users.