
Metadata: Project keywords
 Project keywords provide another way of recording metadata. Why, and when, might you want to use them?
- In my The Golden Girls novel, I have eight characters, seven of whom who dine together each evening during their cruise.
- I also have several themes for this novel, for example: types of love; and the twelve topics in Julia Cameron’s The Artist’s Way.
If I apply these as project keywords on a scene-by-scene basis, I can check for continuity and structure when I reach first draft editing stage. Keeping track of individual character arcs, in particular, can be made easier, using project keywords (and collections).
Note: I write the first draft my novels in scenes, one scene per document. Later, during editing, I group scenes (documents) into chapters (folders).
At what stage should you set up your project keywords?
Project keywords need not be set up before you write your first draft. You can decide what you might need while you are writing, or much later, and then apply them to documents once that first draft is written.
When did I set up my project keywords?
I’m just at the planning stage of The Golden Girls and I’ve decided to use project keywords in two ways:
- To record the various types of love I’m hoping to demonstrate within particular scenes
- To record who appears within (or gets a mention in) each scene
Later, I might consider whether I need more project keywords. Since they appear as coloured chips in the Outliner and on the cards on the Corkboard, having too many could be confusing.
Setting up project keywords
![]() Project keywords, as the name implies, apply to the whole project.
Project keywords, as the name implies, apply to the whole project.
To view the current project keywords or to set up more, select Project / Show Project Keywords – or click on the Keywords icon in the main menu – or you can access through the Inspector (this option is explained further on in this blog post).
Once you have the pane open, use the + button (bottom left of the pane) to add an extra entry.
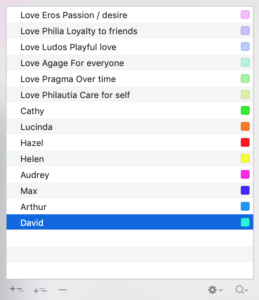
Keyword chip colours
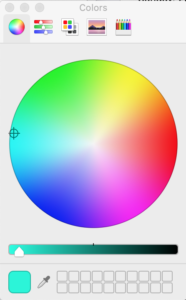
Colours for the keyword chips are provided by default, but you can override these and choose your own. Simply double-click on the coloured square alongside a project keyword and move the cursor across the circle until you reach the colour setting you want to use.
I’ve made all the ‘character’ colours darker (closer to the edge of the colour circle) and the ‘love’ colours paler (closer to the centre of the colour circle).
Assigning keywords to a document
There are two ways of assigning project keywords to a document.
- Using the Inspector
- Using the Binder
Assigning keywords using the Inspector
Select a document via the Binder, the Outliner or the Corkboard. In the Inspector pane for that document, click on the metadata icon. Then, within the Keywords section of this pane, click on the cog wheel to open the drop-down menu for the project keywords.
This image shows how I accessed the first document via the Outliner, and the assigned keywords for this document through the Inspector.
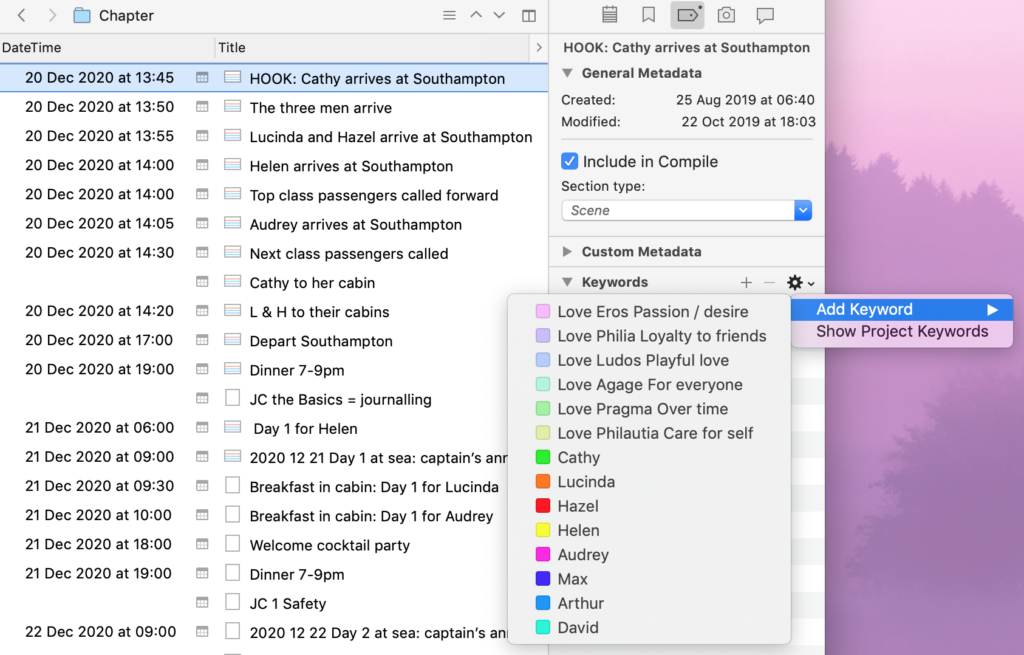
If you have yet to set up the project keyword you want for this document, you can do it now.
- Select Show Project Keywords and you’ll be presented with the Keywords dialogue box.
- Click on the + sign and enter the details of your new keyword.
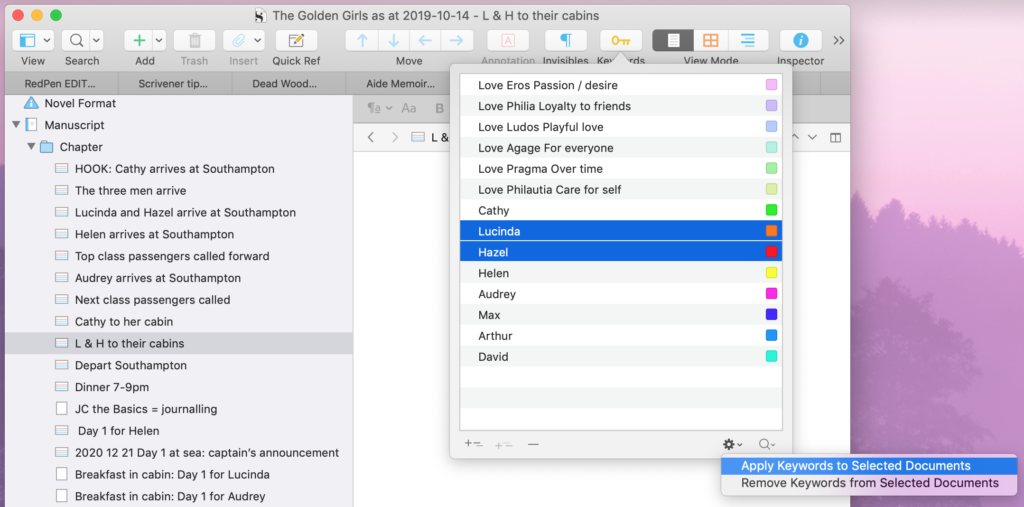
- Click on the cog wheel and select ‘Apply keywords to selected documents’.
If you’ve already set up your project keywords, select Add Keyword and make your choice.
Assigning keywords using the Binder
It would be time-consuming to apply individual keywords to individual documents via the Inspector, but there is an option to apply a keyword to a number of documents.
- First, in the Binder, select the document(s) for which you want to assign the keyword(s).
- This route is then through the menu (click on Project / Show Project Keywords) or the toolbar (click on the Keywords icon). Either will open the Keyword pane.
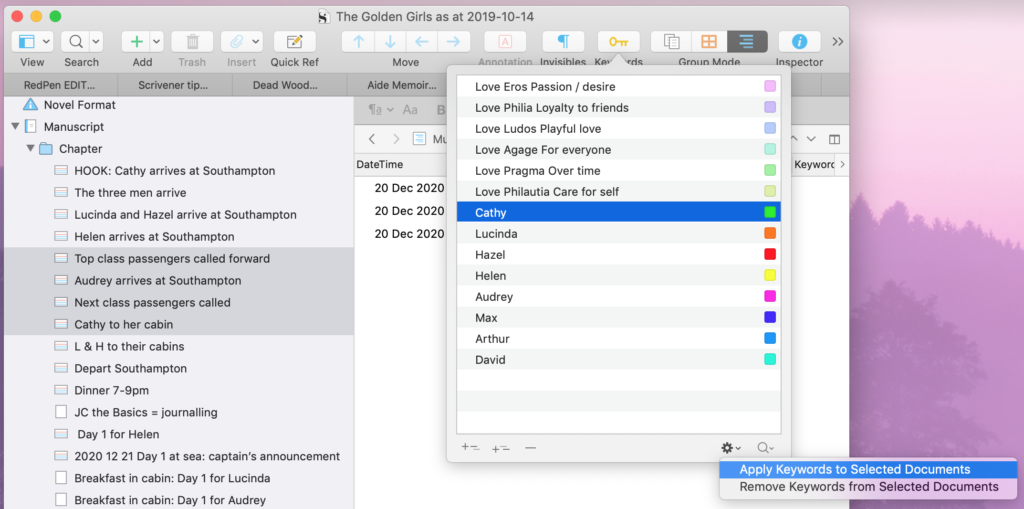
It’s even possible to apply more than one keyword to a single document – or to a group of selected documents.
The order of presentation of the keywords
In the Project keywords dialogue box, the keywords appear in the order you set them up. New ones are appended to the list already there. You can change the order by dragging entires up or down the list.
Similarly, in the Inspector (and in the Outliner and on the Corkboard), the keywords for a given document/scene are in the order you added them. You can change this by dragging entries up or down the list in the Inspector. This then affects the presentation in the Outliner and on the Corkboard.
Viewing project keywords on the Outliner
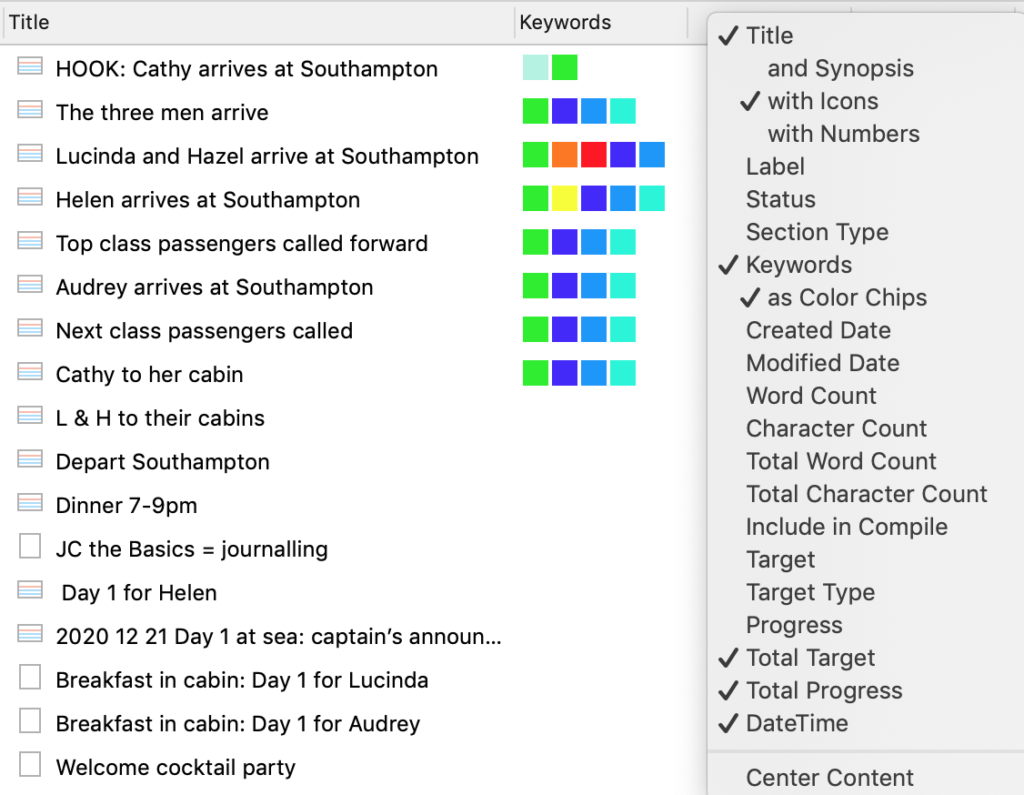
Keywords is one of the standard options for the Outliner view; so, to have it visible, just tick that option. And then drag the column to wherever you’d like it to appear. I have mine to the right of the title.
In the Outliner view, the keywords are underlined in the chosen colour.
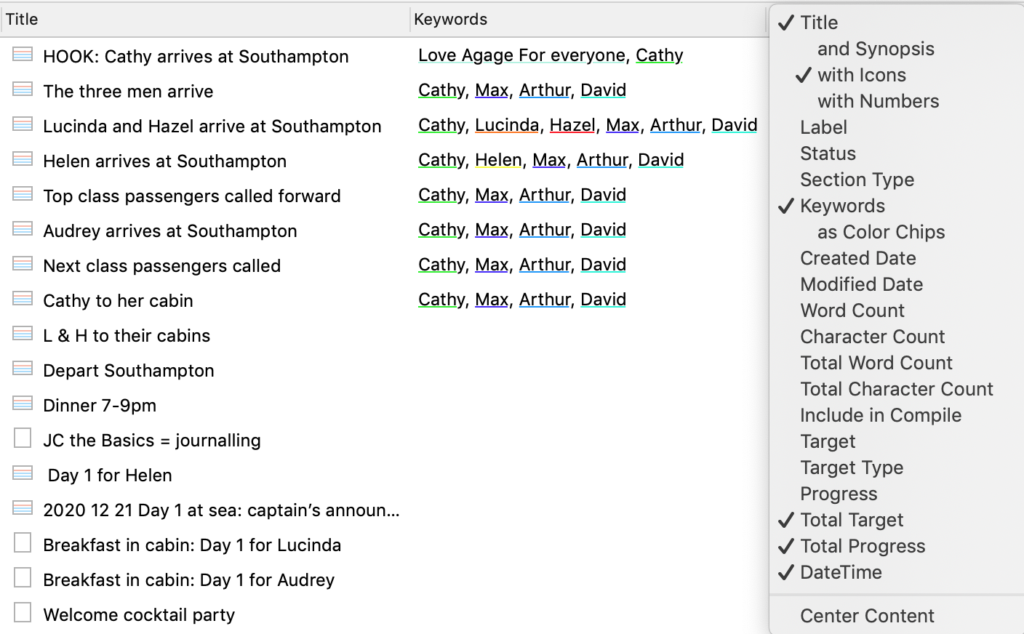
If, like me, you prefer a colour coded display, taking us less space, instead of the project keywords, you can display colour chips instead.
Keywords on the Corkboard
If you prefer a visual form of your outline, the keywords can also be seen on the Corkboard. First though, you have to make sure you have opted to view these keyword chips.
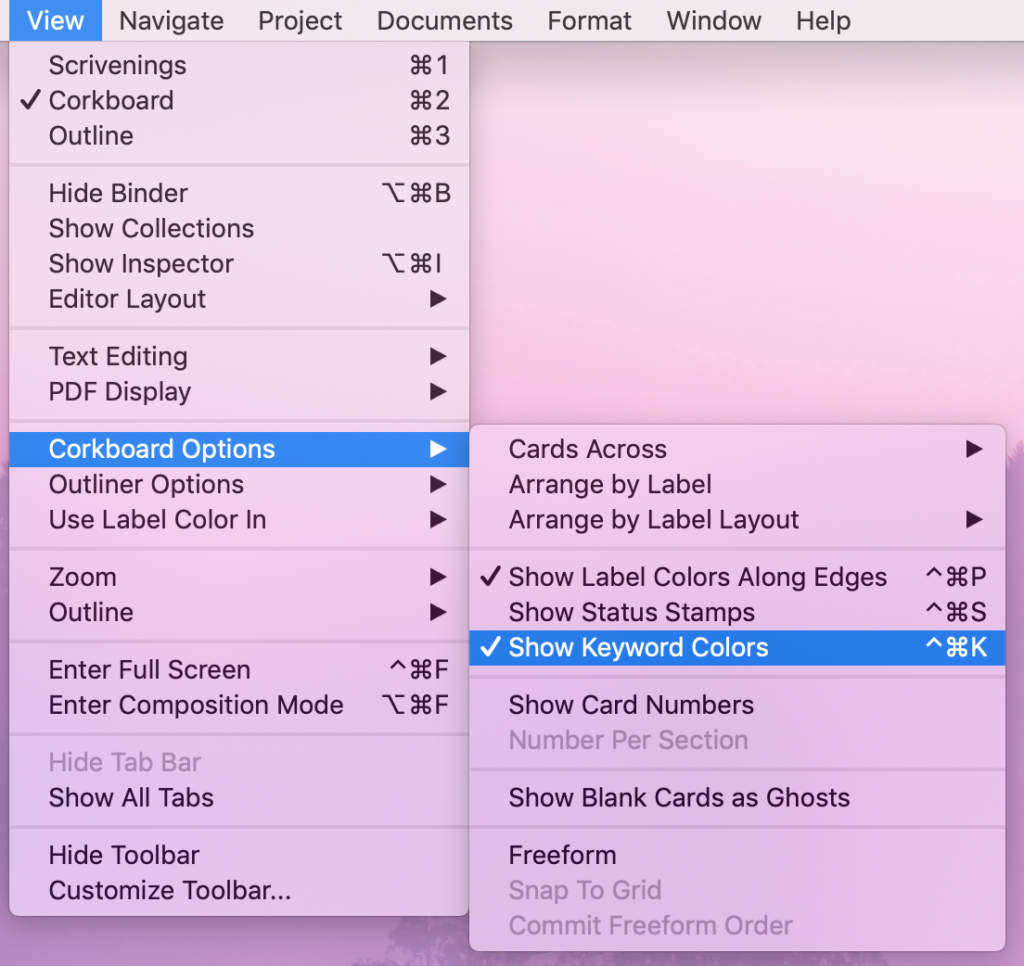
If you have five or fewer keywords, the coloured strips are easy to see.
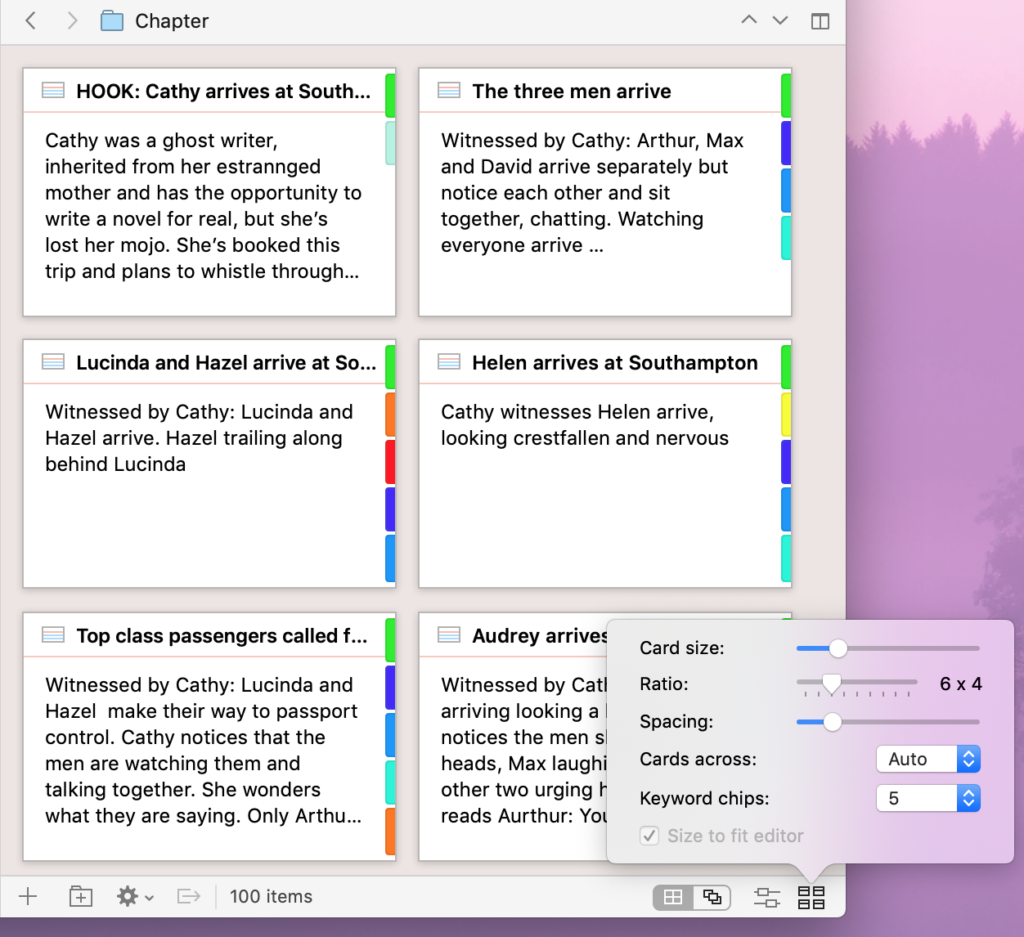
If, like me, you have more than five keywords, click on the bottom right icon and select a higher number of chips. You might also change the card size so that all of the synopsis is visible.
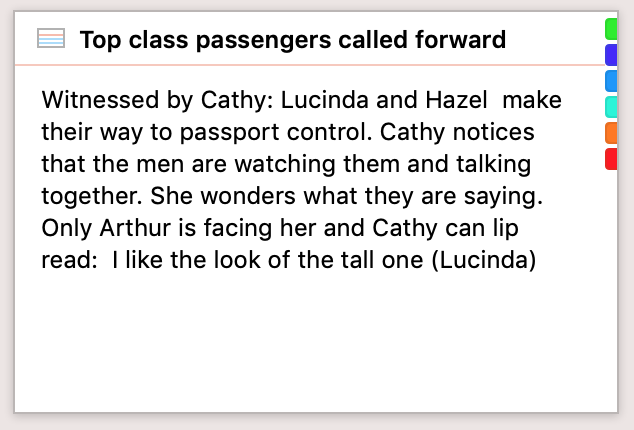
Benefits of using project keywords
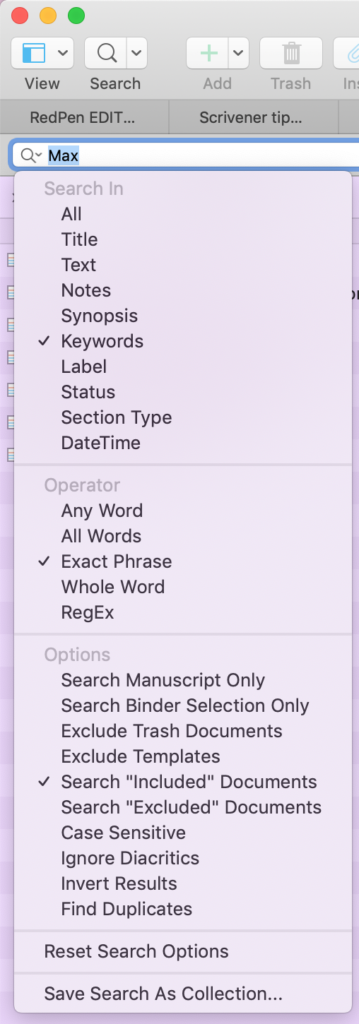 The main reason for going to the trouble of setting up keywords and assigning them document by document (for me, scene by scene) is to allow you to identify those which match some criteria.
Within the Outliner, you could spot (say) a dark green keyword chip each time it appears – when you scroll down – and this might help you to decide whether these scenes are well placed within the structure of your novel.
Another option is to search on that keyword, and create a collection.
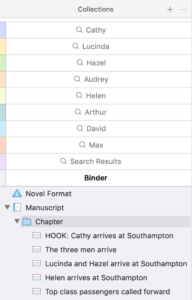
The collections are dynamic, so whenever you want to check eg for continuity or a character arc, all relevant scenes (ie those to which you have assigned that keyword) will appear within that collection.
Removing keywords
The minus sign (bottom left of the Project keywords pane) allows you to remove keywords from the project. Select the keyword(s) you want to remove, and click on the minus sign.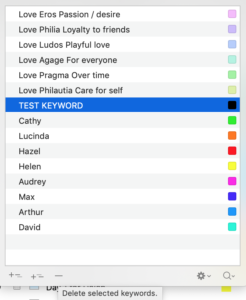
A warning message appears!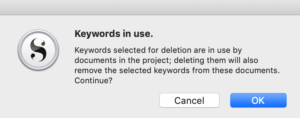
Click OK to continue (if that’s what you want to do).

To remove a keyword (or more than one keyword) from a single document, open the Inspector for that document, and within the Metadata pane, in the Keywords section, highlight the keyword(s) you want to remove. Then click on the minus sign to remove it.
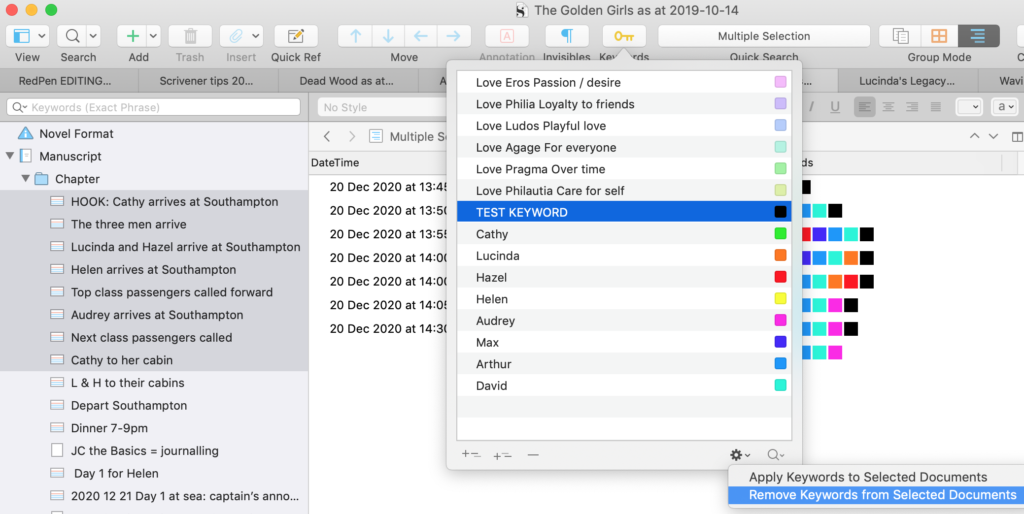
To remove a keyword (or more than one keyword) from a document (or more than one document), select the document(s) and open the Project keywords pane. Click on the cog wheel and select ‘Remove Keywords from Selected Documents’.
Starting your own novel? Need a helping hand?
To watch me go through the process of setting up keywords for a new novel or to ask any questions, book a Simply Scrivener Special.
To help me to prepare for the webinar, you could also complete this short questionnaire.
The ScrivenerVirgin blog is a journey of discovery:
a step-by-step exploration of how Scrivener can change how a writer writes.
To subscribe to this blog, click here.
You can also find links to blogs of specific topics in the Scrivener index.
Also … check out the Scrivener Tips
on my ScrivenerVirgin Facebook page.


Pingback:Scrivener Advent Calendar: K is for ... - ScrivenerVirgin
18 December 2024 at 06:44Steve Shipley
26 June 2021 at 03:02Thanks Anne for this post. I have never used Project Keywords before, and that has caused me to over-engineer custom metadata and my use of Labels. Now that I understand the purpose and benefits of Projects Keywords, I can grab a lot more control over how to related chapters as I rewrite them to ensure I am still consistent with other chapters written before. Very helpful and such a great, well-written post to help understand everything I need to know to start using immediately!
Anne Rainbow
26 June 2021 at 05:58You’re welcome, Steve. All power to your elbow!
Pingback:Scrivener ASVR Workshop 2020 | Lorelle Writes
11 July 2020 at 19:47Brenda Ricotta
25 June 2020 at 15:32Is there a way to set up a list of keywords globally in a manuscript to use for line editing, sich as -ly or passive voice, etc.?
Anne Rainbow
28 June 2020 at 12:58Hi Brenda. If you are planning to use these ‘keywords’ to locate documents (scenes) in which you’ve used them, I recommend you use the Collections feature. This blog explains. https://www.scrivenervirgin.com/2018/07/global-big-picture-tasks-first-fix-editing/ If you want to use the same list for all of your manuscripts, set up the collections in a new project and save that as a template. Start all new projects after that using your new template. Hope this helps!
Tony Tkach
19 January 2020 at 17:58Ah, there it is – thanks!
Tony Tkach
15 January 2020 at 14:48I’m interested in purchasing your book, but can’t get it at Amazon Canada. Is there a way around this problem?
Anne Rainbow
15 January 2020 at 19:44Hi Tony. My book is available all over the world. for Canada, this is the link: https://www.amazon.ca/EDITING-RedPen-Way-successful-self-editing-ebook/dp/B01L25U2TU
Kind regards
Anne