Editing pane options: Outliner
The Outliner tracks progress
The three Editing pane options are: your Scrivenings, your Corkboard or your Outliner view.
- In a previous post, I looked at Scrivenings.
- Last time, I focused on the Corkboard.
- Today, it’s all about the Outliner view.
Outliner view is not for outlining?
You can use the Outliner to outline your novel, if you wish. I prefer to use the Corkboard as it gives me the card image which matches how many plan their novels: on physical index cards or post-it notes placed on a board or on a long strip of paper pinned to your wall.
But, after I have set up the cards on my Corkboard, and I start writing, I can check my progress per scene using the Outliner. This screen grab shows the state of play for my novel Dead Wood ahead of November 2018. Lots of scenes, all with an arbitrary 500 word target.

For details of how to set up the targets, see this blogpost.
The default headings in Outliner view (shown below) are okay, but you can easily customise this so you see what you want see.
![]()
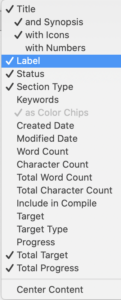 During NaNoWriMo, I don’t need Label or Status; I view this data on the Corkboard.
So, I just untick those from the dropdown menu that appears when you right-click on the header bar.
Using the Outliner during NaNoWriMo
Once I start writing, the Total Progress bars become coloured according to the proportion of words I’ve written, against my target words for that scene.
- Blank means no progress.
- Blue means some progress.
- Green means I’ve written at least 500 words.
I set my scene target (arbitrarily) as 500, but only because I guess I need at least 100 scenes and, for NaNo, I’m aiming to write 50,000 words. 50,000 divided by 100 equals 500. See this blog post if you’d like to do the same.
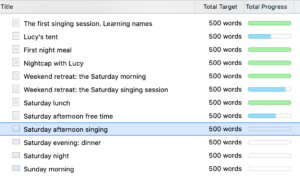
So, when I’m thinking what to write next, a quick glance at the Outliner shows me where I need to focus attention. The next scene/document that has no words so far!
Notice the icons in the screen grabs above and below. To learn more about what they mean, read this blogpost.
Viewing Project Keywords
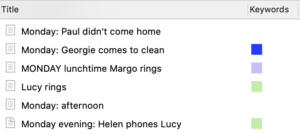
Keywords is one of the standard options for the Outliner view; so, to have it visible, just tick that option. And then drag the column to wherever you’d like it to appear. I have mine to the right of the Title.
In the Outliner view, the Keywords are underlined in the chosen colour.

If, like me, you prefer a colour-coded display, taking us less space, rather than the project keywords, you can display colour chips instead.
Using the Outliner during editing
Once I’ve completed the first draft and grouped my scenes into chapters, the Outliner comes into its own.
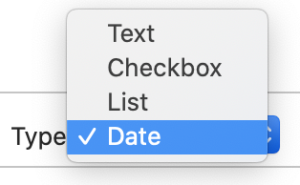
The custom metadata offer four types of data.
- Text
- Checkbox
- List
- Data
The Date option (which includes time) allows me the option of a timeline.
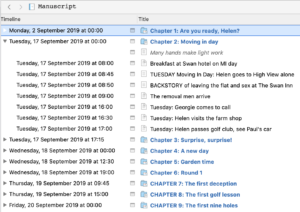
This blog post explains all!
I also keep track of progress through various review stages using the Checkbox and Text metadata options.
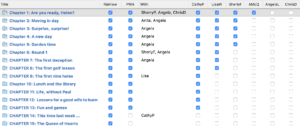
I put some scenes though ProWritingAid to identify issues that I need to apply to the whole manuscript. But my main use of PWA is at chapter level.
Once a chapter has been reviewed by my local face-to-face group, Ria View, I incorporate their feedback and then pass it through PWA to make sure it’s as clean as can be, before anyone else sees it.
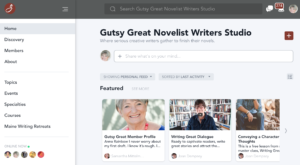
I then have a number of feedback partners within Joan Dempsey’s Gutsy Great Novelist Writers Studio community. They read and comments my chapters and, in return, I read and comment on theirs.
Scrivener helps me to keep track of which chapters have been reviewed by whom, and which chapters are waiting on a review.
I have yet to identify a use for the List custom metadata feature, but would welcome your suggestions. Comment on this post. Thank you!
Sorting data in Outliner View
Clicking on a heading results in a re-sorting of the rows according to that column heading.
For example, clicking on the DateTime heading affects the order of the scenes as they appear in the Outliner; it has no effect on the order within the Binder.
The sort toggles between three states:
- Date/time order ascending (no entry comes before any with an entry)
- Date/time order descending (no entry comes after any with an entry)
- The order the scenes appear in the Binder.
I will want the scenes in my Binder to be in chronological order so I stick to the third option and drag scenes up/down as necessary within the Outliner view.
NB When a scene is moved in this way in the Outliner view, it also moves within the Binder.
Why might you want to sort in the Outliner?
When I’m writing ‘scenes’ during NaNoWriMo, I sometimes can get carried away and write text which, eventually, will need to be split into more than one scene. A quick way of spotting these overlong ‘scenes’ is to sort the scenes by word count. Clicking on the ‘Total Words’ heading has this effect.
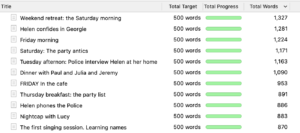
My strategy would then be to read the longest ones and use Documents / Split at Selection to create two smaller ‘scenes’. Only when scenes really are scenes (one place, one time, one cast) can I start applying metadata sensibly.
The bottom line
As with the Scrivenings and Corkboard, the bottom line provides an interface.
![]()
Notice that the left is identical to that shown when you are looking at the Corkboard view. I explained what these five icons represent in the previous post. Here, I’ll focus on the right-hand side.
Toggling centre content
![]() The first symbol on Scrivener 3 – the one that looks like a bullet list with a line above and below – is a toggle icon and it toggles between the outline content being centred and it not being centred.
The first symbol on Scrivener 3 – the one that looks like a bullet list with a line above and below – is a toggle icon and it toggles between the outline content being centred and it not being centred.
![]() To indicate which is operational, the icon alters (as does the content above it).
To indicate which is operational, the icon alters (as does the content above it).
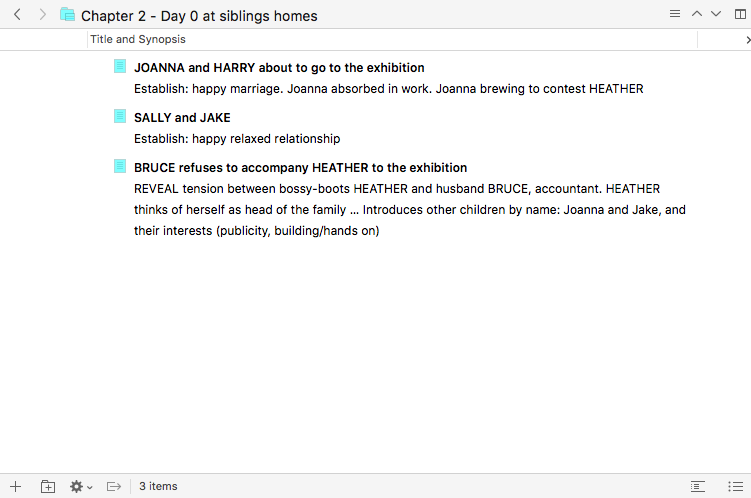
This is the uncentred version, which the manual describes as being ‘like a spreadsheet’. To me, it looks ‘normal’, left-aligned …
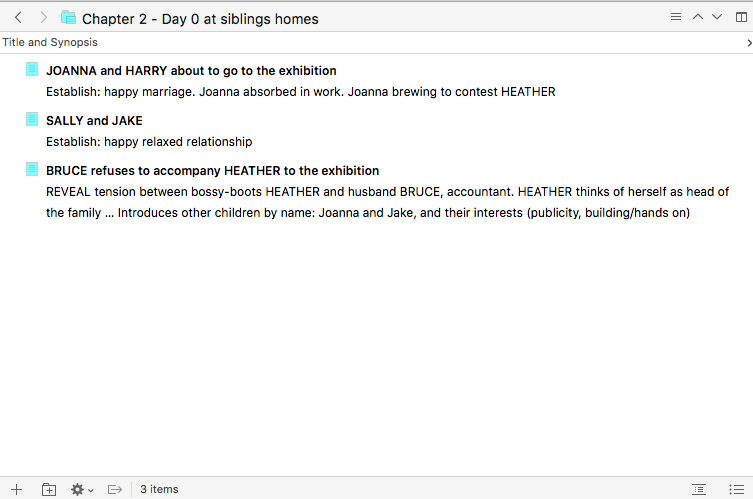
This is the centred version, which the manual describes as ‘a more comfortable environment’.
I think, if I hadn’t spotted this icon, I’d have survived without the toggle option!
Show/hide synopsis
![]() The button on the right-hand side toggles between ‘Hide Synopsis’ and ‘Show Synopsis’.
The button on the right-hand side toggles between ‘Hide Synopsis’ and ‘Show Synopsis’.
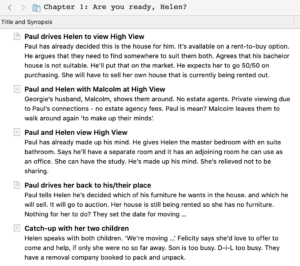
This is the same data that’s displayed on the cards on the Corkboard (which is where I tend to choose to look at it).
Questions about Scrivener? Need a helping hand? Want a demo?
To watch me go through the process of customising the Outliner view, and all these features, or to ask any questions, book a Simply Scrivener Special.
To help me to prepare, you could also complete this short questionnaire.
The ScrivenerVirgin blog is a journey of discovery:
a step-by-step exploration of how Scrivener can change how a writer writes.
To subscribe to this blog, click here.
Also … check out the Scrivener Tips
on my ScrivenerVirgin Facebook page.


Pingback:Scrivener Advent Calendar: O is for ... - ScrivenerVirgin
18 December 2024 at 06:55