Metadata: Titles and synopses
 Metadata: Data about data
A novel is a complex structure, not just a series of chapters broken into scenes, but a carefully woven plait of events and conversations, with interconnected themes, plots subplotslots, enacted by a cast of characters each of whom changes over time.
Scrivener scores 10 out of 10 in providing metadata features that can simultaneously track the separate strands of the tale, measure progress and allow the writer to ‘see’ the whole picture from a variety of perspectives.
Scrivener is not just a word processor; it provides tools invaluable to the writer who is now wearing the editor’s hat!
Meta-data is data about data and, with Scrivener, there are six varieties: Title, Synopsis, Label, Status, Keywords, and Custom metadata.
Today, I am looking at Title and Synopsis.
Metadata for a scene: Title
For each document, creating a title which sums up what happens in that scene provides you, the editor, with an overview of your novel.
- If you write your document titles before you start writing your novel, these titles provide prompts as to what ought to be in the scene and reminders of the outline you devised.
- If you are a pantser and you now have hundreds of documents, maybe not in the correct scene order and maybe not all the scenes have been written, reviewing the content and writing a title is step one in identifying the structure of your novel.
So, whether I already wrote a title before I wrote the ‘scene’ or not, I read through the text to remind myself what I wrote.
- I check that the document contains a single scene, not several runs together.
- I decide how best to describe each scene – and write that as my Title for the document.
When is a scene not a scene?
It’s easy to get carried away when writing, especially during NaNoWriMo. What started out as a conversation between two characters, who meet while waiting for a bus, can end up including their conversation on the bus and, for one of them, what happens after they go their separate ways.
When reading through the content of a single document be aware of the scene components:
- A cast of characters
- At a location
- At a time
If someone new arrives, or someone leaves, you should start a new scene. If the location changes, start a new scene. If there is a jump in time, start a new scene.
How to split a document to create one scene per document
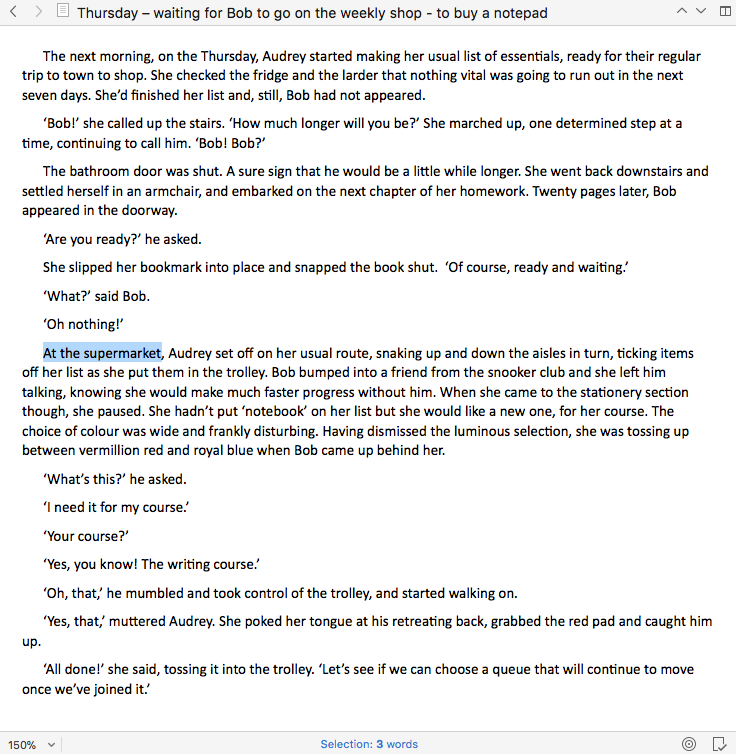
In this document, at the start, the location is at Audrey’s home. Then they go to the supermarket. It ought to be split into two documents, one per scene.

If I highlight ‘At the supermarket’ and select Documents / Split / Split with Selection as Title … Scrivener puts the text into a new document with a new title.

I then need to fix the document titles, so they describe more precisely what happens in each scene. You can do this in the Binder, or in the Inspector.

So, this is the end result: both scenes are scenes and both are appropriately titled … for now!

Later, once I’ve set up my other metadata fields, some of this title metadata may be redundant. I’ll cross that bridge when I get there.
Metadata for a scene: Synopsis
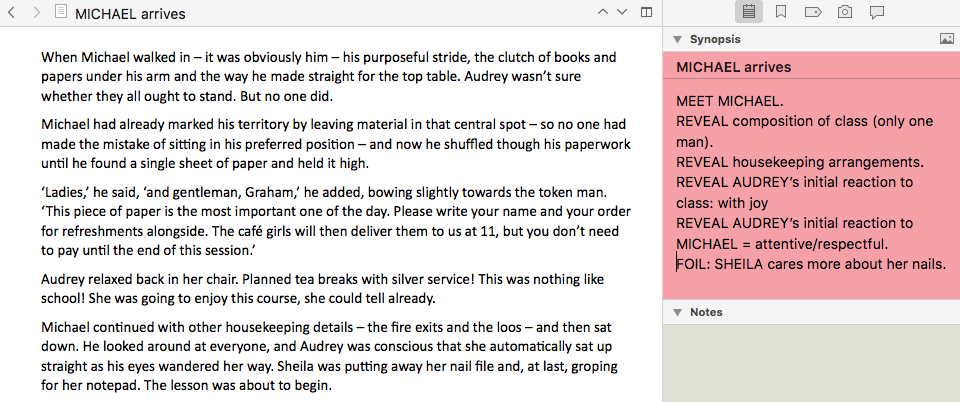
Once the title (as brief as possible) has been determined, the next challenge is to write the synopsis (or check an already written one). This is done within the Inspector pane – make sure you have the Notes pane open.

Notice that, in this example, I use these stock phrases:
- MEET – to identify when a character first appears (the character entrance)
- REVEAL – to identify a fact about a character or an event that the reader needs to know
- FOIL – when I am comparing characters/actions to make a point
I also use capital letters for character names so they jump off the screen at me.
Later, I’ll be checking the content of the synopsis against my character sketches to ensure the arcs ‘work’, and I’ll also be checking it against my plot timeline too.
Progress check
I set three tasks in the previous blog post:
- Task 1: Write an appropriate title and synopsis for each scene
- Task 2: Decide how to best use the Label metadata field – and apply to each scene
- Task 3: Output, using Compile, the scene synopsis for review purposes
This post has shown how to do Task 1. Next time, I’ll focus on Task 2.
Questions? Need a helping hand? Want a demo?
To watch me go through the process of splitting documents, assigning titles and synopses, or to ask any questions, book a Simply Scrivener Special.
To help me to prepare, you could also complete this short questionnaire.
The ScrivenerVirgin blog is a journey of discovery:
a step-by-step exploration of how Scrivener can change how a writer writes.
To subscribe to this blog, click here.
Also … check out the Scrivener Tips
on my ScrivenerVirgin Facebook page.


No Comments