
Compiling with Scrivener 3: Contents page for an eBook
Post amended: 17 August 2019, to include the autogeneration of a ToC!
An ebook needs a dynamic contents list
The process of setting up a table of contents (TOC) is straightforward!
First, you have two choices:
- Let Scrivener do it for you
- Do it yourself
Letting Scrivener do it for you
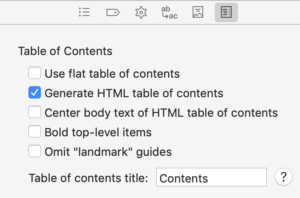 When you choose ebook from the output options, an additional icon appears in the right-hand pane. The default setting is that Scrivener generates the ToC page for you with the title ‘Contents’.
Try this (without making any changes to the default settings) and see what you think of the ebook Scrivener produces.
I prefer to generate my own ToC, so I uncheck the ‘Generate HTML table of contents’ box and use the DIY method below.
Doing it yourself
Step 1: Decide what is to appear
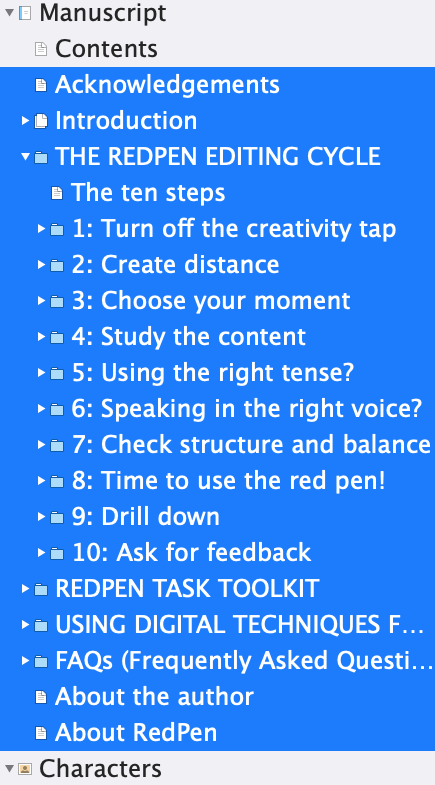
Your aim is to set up the Binder so it shows whatever you want to appear in the content list.
Bear in mind that each entry will form a hyperlink, so be as helpful to your reader by providing a clear view of the structure of your book.
Expand/collapse folders to suit yourself – and your readers – and then, select them all as shown in the image.
NB: Don’t include the Contents!
Step 2: Create the contents list on the clipboard
Having set up the Binder as you wish, and selected the relevant entries, select Edit / Copy Special / Copy Documents as ToC.

Step 3: Paste the ToC into the Contents document
I already had a document called Contents, so I Selected All before I pasted the new ToC into place.
Step 4: Choose the Table of Contents settings
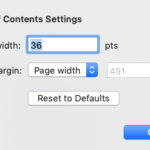
As soon as you paste the ToC into place, Scrivener presents you with this pane. I didn’t argue! Click Ok.
This is what then appeared. The <$p> at the end of each line are for the page numbers which would be automatically calculated during the compile process.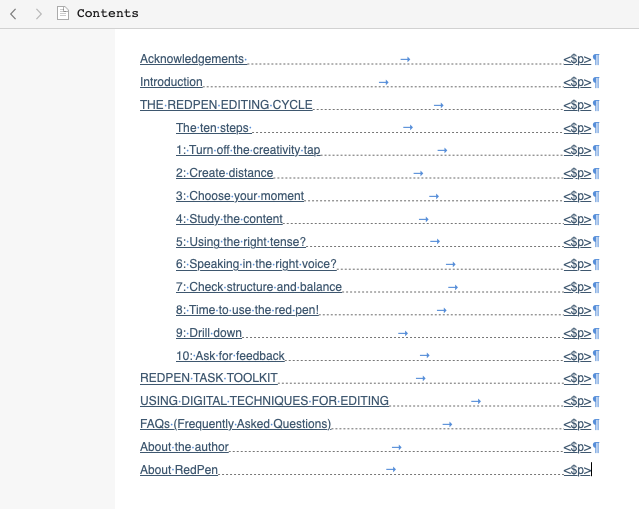
For an eBook, the page numbers are not needed, so delete them all, leaving just the hyperlinks for the titles of your documents. It should look like this before you compile.
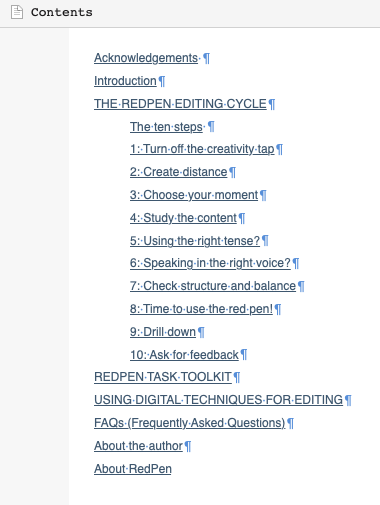
And, when you compile …
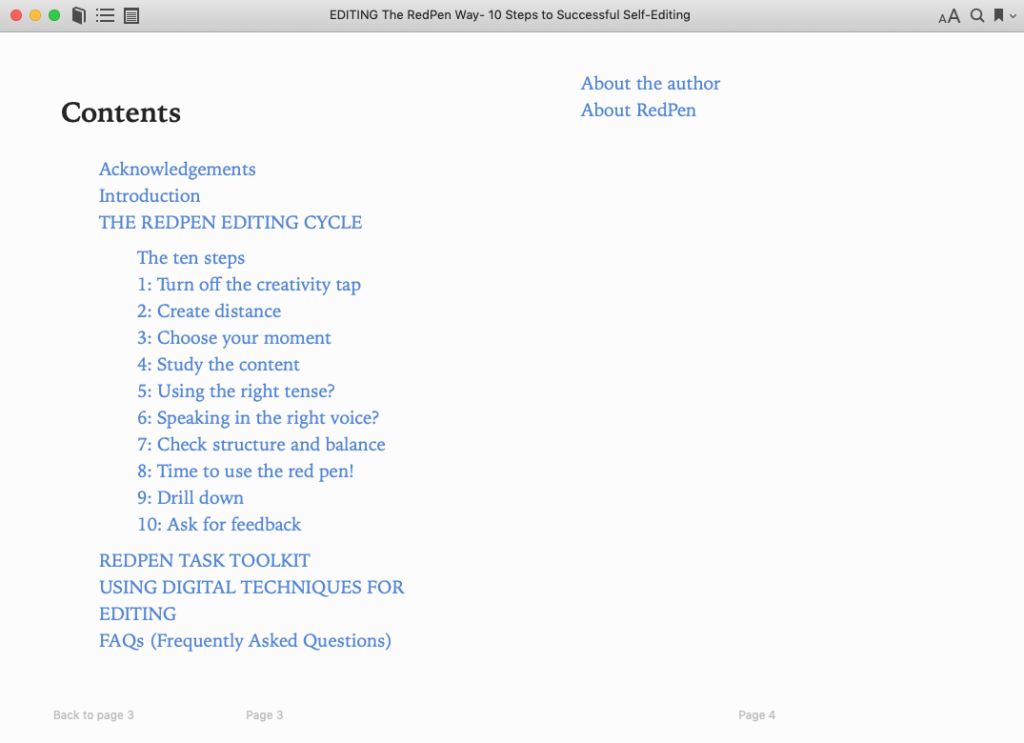
You might be tempted to add more detail to the contents list, or take some material out, to make it fit better on a page. However, remember that the reader decides on the page size. Best to leave well alone. It works, and that’s enough.
Questions? Need a helping hand? Want a demo?
To watch me demonstrating how to set up the ToC for an ebook or to ask any questions, book a Simply Scrivener Special.
To help me to prepare, you could also complete this short questionnaire.
The ScrivenerVirgin blog is a journey of discovery:
a step-by-step exploration of how Scrivener can change how a writer writes.
To subscribe to this blog, click here.
Also … check out the Scrivener Tips
on my ScrivenerVirgin Facebook page.


Bob
12 October 2021 at 15:31The copy and paste as TOC worked great. However, I did not get the screen asking for TOC formatting. When I compile in ebook format, scrivener does not recognize the custom contents page – still creates its own.
Anne Rainbow
17 October 2021 at 05:59Hi Bob. there is a setting which is the default and which you’ll need to untick. I mention it and provide a screen grab so you can find it here: https://www.scrivenervirgin.com/2019/04/compiling-with-scrivener-3-contents-page-for-an-ebook/ Good luck!
Pingback:Scrivener – Gears in Progress
4 January 2021 at 23:09Merv Miller
24 January 2020 at 23:07A comment and question. Comment – the write-up above does not specifically state to paste the highlighted Binder contents to the “Contents” document. Small item but confused me.
Question – having followed your instructions above I DO create very nicely formatted ToC and what appear to be hyperlinks, but none of these links work. They work fine in Scrivener, they do not function in my iPad 10.5 as a Kindle .mobi. The links are blue and underlined, but they are static like normal text. Trying to build a Cook Book for the wife with hyperlinks for global categories like “Main Dishes” and “Beverages” and so on with specific recipe documents under those global categories.
Anne Rainbow
25 January 2020 at 19:26Hi Merv. Step 3 is the one that specifies that you need to paste the highlighted Binder contents into the Contents document. I’m not sure why your links are not working; they should …. Try exporting to an eBook format. If it works there, then the problem lies with the export for Kindle? If you’d like to send your project file to me (use WeTransfer), I’ll have a look at it and see if I can discover what’s going wrong.
Mervin Miller
26 January 2020 at 03:43Anne; thank you for the offer, but the project isn’t that important. I did export as an eBook and that failed. I also observed situations where as I tried different Binder configurations the hyperlinks were not generated, just flat lists. Cannot figure out what change did what.
I really haven’t liked Scrivener 3 for Kindle .mobi files because paragraph indents were eliminated, making my eBooks harder to read.
And the Kindle Previewer 3 app is not a faithful representation of the .mobi file displayed on an iPad. Nothing nice to say so won’t say more.
Anne Rainbow
26 January 2020 at 05:10My strategy is always to compile, examine what’s produced, identify what I want to change, change ONE THING … repeat. I therefore move forward. If you change too many things at once, it’s tricky working out what had what effect.
For the indents, these are controlled within Compile. But with eBooks, because the reader can change so much, it’s better to use a blocked style, with some leading between paragraphs.
Re the Kindle Previewer: I always focus on the eBook and get that how I want it, and only then try to output to Kindle.
It’s all achievable … have faith. Reach out to those that can/will help.
PJ
17 August 2019 at 03:33Thx for creating this. Very clear, very helpful. Just curious tho: Scrivener will automatically build a TOC for ebooks from the Binder structure. What is the advantage of doing the copy-and-paste approach outlined in the article?
Anne Rainbow
17 August 2019 at 06:55The automatic build available in Scrivener 3 does create a TOC, that’s true. My initial reaction to this was that it provided a short cut while the Scrivener 2 method (which I explain) gives greater control over what appears on the page. With the auto build, Scrivener decides on the entries based on your structure, which might be exactly what you want. Or not. The manual approach also works for outputting to paperback – and shows the use of placeholders and tab jumps, invisibles etc. So, I guess ‘why I did it this way’ was because I felt my readers could cope with doing it for themselves, and I was reluctant to give them the shortcut!
Anne Rainbow
17 August 2019 at 10:48I’ve now added the short cut option …