Structuring in Scrivener: Formatting levels
 Structuring in Scrivener is all about creating folders and documents…
and determining the formatting levels of each component of your manuscript.
Levels are important when you Compile – your decisions on formatting for the page apply to one level at a time.
What are formatting levels?
Within the binder, entries are indented to indicate different levels within the structure of your manuscript. Anything flush to the left is Level 1; anything indented from that is level 2; and so on.
In the practice novel I set up in a recent Simply Scrivener Special webinar, the structure is very simple: the folders are chapters and the documents within them are the scenes.
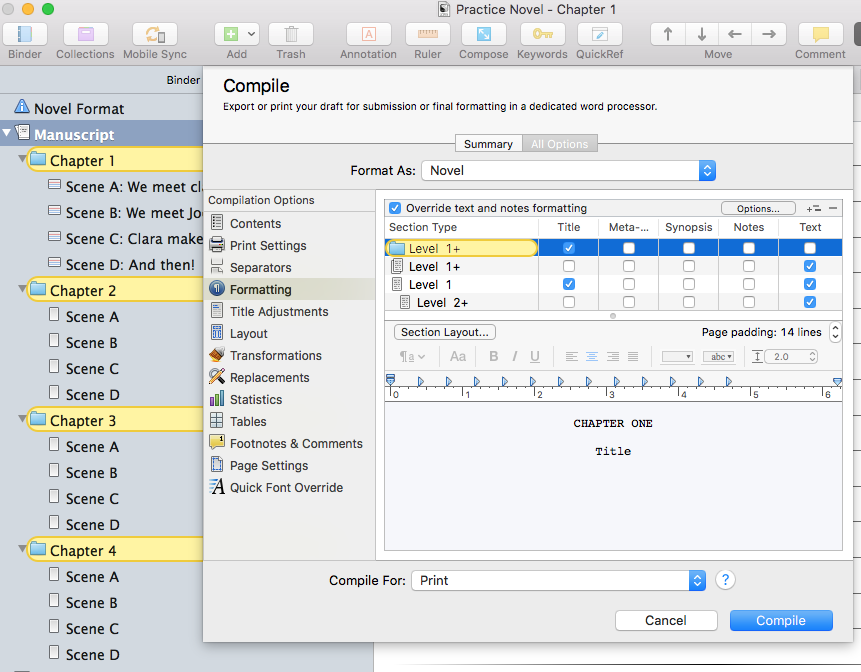
When you select File / Compile and click on the Formatting tab, one of these levels is formatted at a time. And all elements at that level are formatted in the same way.
Formatting at Level 1+
Notice that, when the blue folder entry (labelled Level 1+) is selected within the Compile pane. Then within the binder, the folders at level 1 are also highlighted. The yellow colouring makes it crystal clear which elements of the manuscript will be affected by the decisions you now make regarding formatting of this level.
Formatting at level 2+
Now, if you select Level 2+ instead, all the scenes are selected in the binder.
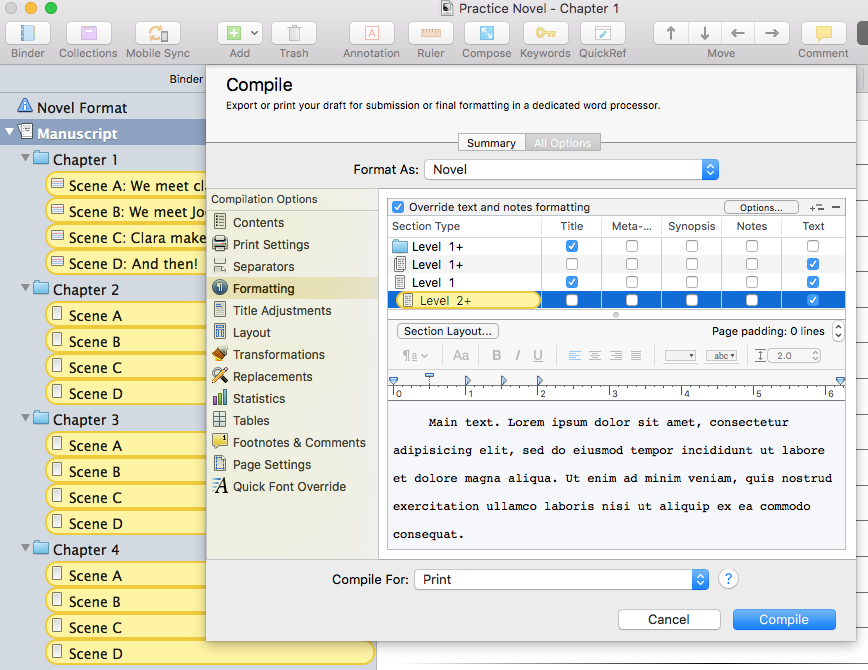
Notice that the Level 2+ icon in the Compile pane is a document with text, but that it selects empty documents for which I’ve only written a synopsis (in chapter 1) plus all empty documents in Chapters 2, 3 and 4. Scrivener doesn’t mind that I’ve not yet written my novel!
What about the other options at Level 1?
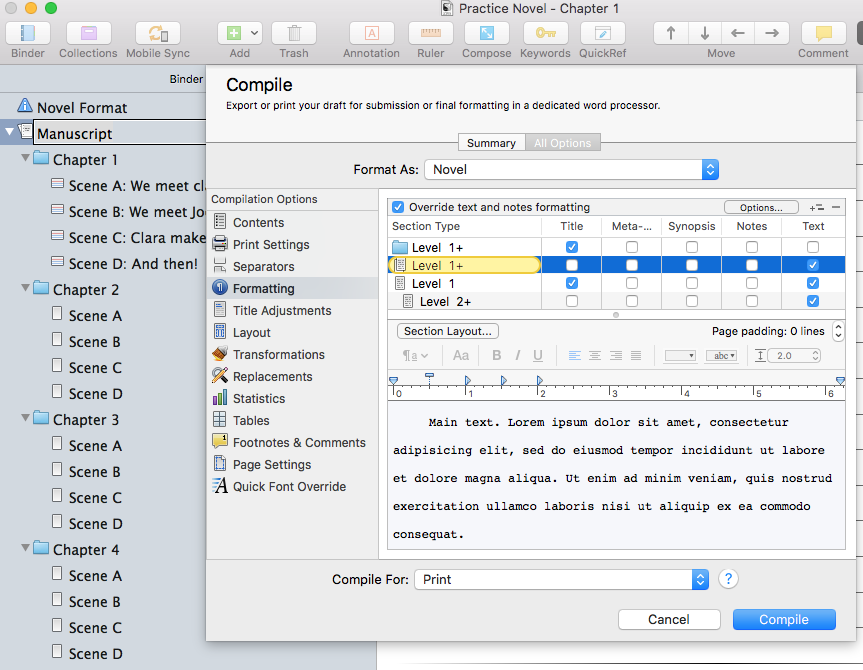
If you select either of the other two options within the Compile pane, nothing is selected in the binder.
This is because the manuscript doesn’t have any entries at these levels.
In more complicated structures, if you choose to have documents within documents. Then the double page icon will appear in the binder and that would match the Level 1+ entry in the Compile pane.
Ditto, if you decide to have a document at level 1 – ie at the same level as my chapter folders. Then the formatting of this would be controlled through the Level 1 entry.
Formatting for the page
If you have a good structure – the simpler the better. Then the task of formatting for the page is relatively easy. For more information about formatting for the page, see this series of posts.
If you’d like to see a demonstration of any of the features discussed in this blog post, book a Simply Scrivener Special.
The ScrivenerVirgin blog is a journey of discovery:
a step-by-step exploration of how Scrivener can change how a writer writes.
To subscribe to this blog, click here.
Also … check out the Scrivener Tips
on my ScrivenerVirgin Facebook page.


No Comments