
Placeholders: An Introduction
 The word ‘placeholder’ has two interpretations in a Scrivener context.
- Loosely speaking, a placeholder is something which ‘holds a place’ until you, the writer, provides better information.
- More specifically, tag words are strings of code that act as placeholders and which will be assigned a value by the Scrivener software during compile .
My focus in this series in on the tag words, but let’s deal with the more general interpretation of the term ‘placeholder’ first.
Placeholders that act as a default in the absence of better information
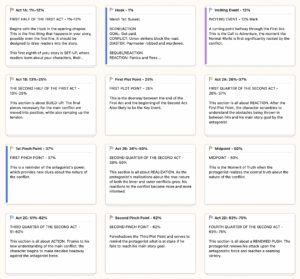
During the planning stage for a book, you might set up a structure which contains placeholder documents which you will eventually populate with your own writing. One such example is included in the KM Weiland Scrivener template.
Another example would be a story board. Using the Corkboard view, you could write just the synopsis for each scene. Later, you’d write the scene …
Such placeholder documents allow you to develop your manuscript in what might seem a somewhat haphazard manner. But, such an approach – working from the top down – is common, for example when writing a text book, the structure of which has to follow an examination syllabus. I explain the process in this blog post.
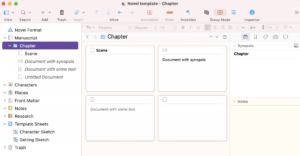
As you continue to create your material, in the absence of specific information, such as a title of a document/folder, Scrivener uses an adaptive name, according to a hierarchy: title, synopsis, main text content, placeholder text.
Example: Placeholders in the Binder
If you type a title in the title box for a document, that title will appear in several places: in the Binder, in the header bar of the Editing pane, in the Inspector.
If you don’t type in a title, but have entered a synopsis for that document , the first line of text of the synopsis will serve as a placeholder for the title wherever the synopsis is not otherwise shown. Notice that placeholder text is in italic.
If you don’t type in a title, and haven’t entered a synopsis, then the first line of text within the document is used as a placeholder for the title. Notice again that placeholder text is in italic.
If you don’t type in a title, and haven’t entered a title, and haven’t entered any text in the document either, then ‘Untitled Document’ or ‘Untitled Folder’ (depending on which applies) will be displayed as a placeholder. Notice yet again that placeholder text is in italic.

Example: Placeholders in the Synopsis
When you enter text into the Synopsis field for a document, this will appear in the Inspector, and on the Corkboard card, and on the Outliner (if you choose to reveal the synopses). If you don’t enter any text, the placeholder text is the first few words of the text that you’ve entered in the document itself.
Did you know?
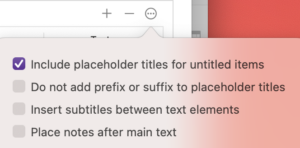
If you export material from your project using File / Export / Files, then the adaptive names are exported. These act as tokens while working on your project.
Adaptive names are not (by default) output via compile, although you can change this through your compile settings. Look for the Options icon when you are editing your project format.
Example: Annotations as placeholders
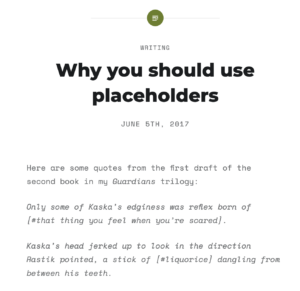 In preparing to write this series of blogs, I Googled ‘placeholders in Scrivener’ to see what others had written to date on this topic.
As well as what I’ve offered above, the term ‘placeholder’ crops up when writers choose to write some placeholder text in place of whatever word or phrase fails to come to them while they are writing.
One such writer, on her blog SoggyMusings, uses square brackets and a # mark to signal material (her placeholders) for a better word/phrase which she can’t imagine as she’s in the flow of writing.
Flow is important!
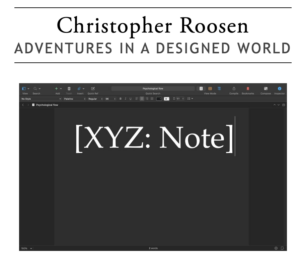 Christopher Roosen also mentions flow when he explains in his blog post how important placeholders are for him.
His placeholder also uses square brackets and he attributes his adoption of this process to an article he read ‘Writing in the Age of Distraction’ by Cory Doctorow.
While I agree that it’s easy to become distracted, especially by research – indeed, I just spent an hour or so Googling in order to find the material for this section (!) – in Scrivener, we have the option to use Annotations for our placeholders.
If you’ve never used Annotations, check out this blogpost.
Example: Grey placeholders
My final example is Scrivener’s way of telling you that something is not available. In menus, instead of whatever you normally see, the text is greyed out and what you are seeing is a placeholder for the option.
In this instance, I’ve just opened the Scrivener project and placed my cursor within the Editing pane.
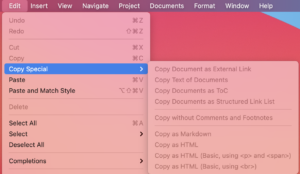
When I select Edit, the first two options (Undo and Redo) are greyed out because I’ve done nothing that can be undone or redone.
Ditto for Cut and Copy because I’ve not selected any text.
Copy Special is not greyed out but when I click on the arrow, all its sub-options are greyed out …
Paste is not greyed out because whatever is currently on my clipboard can be pasted into the Editing pane where my cursor is currently positioned. And so on.
Placeholders given a value during Compile
Now, to the placeholders which involve you in a bit of coding. Tag words!
The tag word placeholder literarily ‘holds the place’ of a value (numerical or textual) that is as yet unknown, but will become known when you compile your project.
Tag words are easily recognised.
- They starts with <$
- They end with >
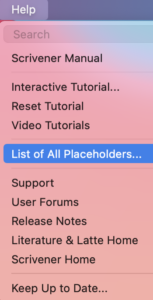
There is a complete list of such placeholders available via the Help menu.
When you select the list, a floating window opens and you can copy and paste whichever placeholder you need. This saves typing them!
And, you don’t have to worry about typing a complicated series of symbols and characters correctly.
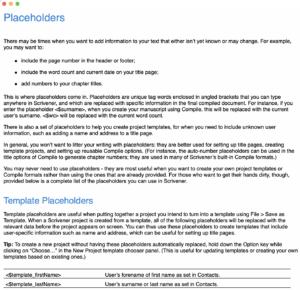
Some tag words are confined to specific tasks, like scriptwriting or creating a template. Others relate to specific features of a book, like the Table of Content, footnotes and endnotes, and comments. Some are confined to specific areas – like the document variables which can only appear within the text, never in a header or footer.
Now what?
Placeholders is a big topic. And, like all things Scrivener, you don’t need to become an expert on it all. Just discover the tag words which serve you well and stick to those.
In the blog posts that form this series, we will examine various groups of these placeholders according to how they might prove useful to you while writing/editing your manuscript and formatting your book. Those that
- are set up already in the Scrivener templates such as the material that appears in the front matter section
- serve to record project specific information such as who wrote it (the author) and the title of the project
- offer you choice as to how the book will be formatted, such as in headers and footers
- save you time and trouble, such as those used for automatic numbering
- provide information for you as the writer/editor such as word count, and dates/times relating to creation and modification
- help with the processing of images: their placement and size.
There are nigh on 150 tag words at your disposal. We won’t cover them all, but I will draw your attention to the basic principles of using them. After that, the fine detail is always available in that List of All Placeholders.
Questions about Scrivener?
Need a helping hand with Scrivener tools? Want a demo? Book your own Simply Scrivener Special session with me, at a time to suit you.
And, if you need a steer on self-editing, check out my RedPen Editing courses. Join RedPen Editing and enjoy a 5-day editing taster course for free.
The ScrivenerVirgin blog is a journey of discovery:
a step-by-step exploration of how Scrivener can change how a writer writes.
To subscribe to this blog, click here.
Also … check out the Scrivener Tips
on my ScrivenerVirgin Facebook page.


No Comments