
Scrivener Advent Calendar: A is for …
 A is for … Annotations
Annotations are messages you leave yourself within the text. Just like you might scribble on the hard copy of a manuscript, you can annotate your text using the annotations feature within Scrivener.
Among all the topics listed in the Index of Scrivener Posts, annotations is one which might well help you to focus on the task in hand, whether you are writing, or revising your manuscript.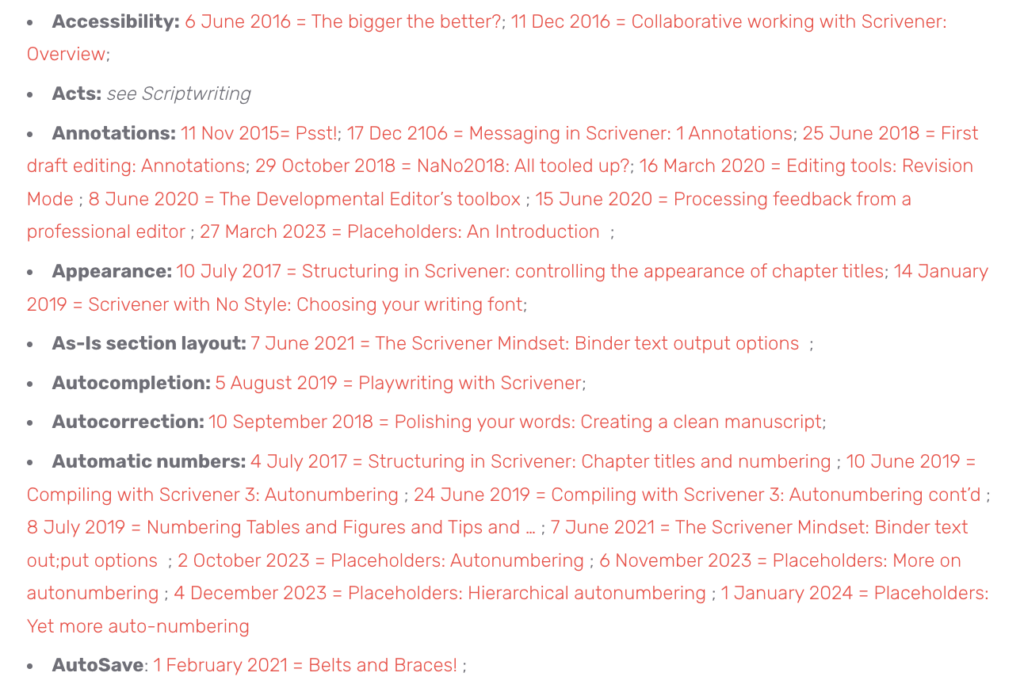 Distractions – and there are more than enough during December? – can disrupt your work flow and have an adverse impact on at least three of the 10 executive functions required for ‘success’.
-
-
- The ability to anticipate what’s coming up and make plans accordingly – see also number 8, flexibility!
- The ability to organise – thoughts, ideas, the scenes/chapters of my novels, …
- Reliability – doing what we agreed when we said it would be done (or earlier!)
- Getting up and getting on with the work – ie self motivation
- Managing our time to achieve the best results
- Paying attention to detail (quality …)
- Remembering stuff that’s important
- Flexibility – willingness to make changes in our plans or our approach
- Determination – ability to keep going
- Willingness to reflect on our own contribution to the team (and learn from it)
-
Scrivener gem
While working on your Scrivener project, if your focus wavers, if a thought enters your mind, rather than allow this to divert your attention, or slow you down, minimise the disruption by creating an annotation – write a message to yourself – and then return to the task in hand.
If you have time today (don’t be distracted from whatever else you had planned to achieve today!), read on. If not, make a note to come back to this post another day.
How do you create an annotation in Scrivener?
You have two options:
- Use Cmd + Shift A to switch ‘Annotation mode’ on and then type your message.
Cmd + Shift A is a toggle switch – the same keystroke combination turns annotation mode off. - Or, highlight the text you want to turn into an annotation and then use Cmd + Shift A.
Scrivener treats annotations like formatted text … and presents them, as red text, within a clear bubble.
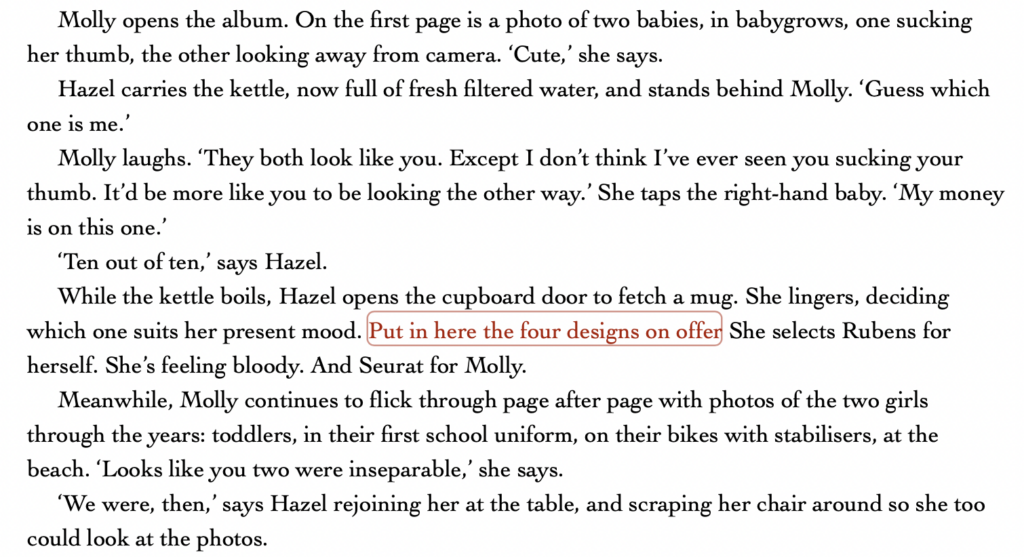
To delete an annotation, simply delete the text and the bubble: position the cursor at the right-hand end of the bubble and use the Delete key to delete every character in the annotation. Or, right click anywhere within the annotation text, select Select Annotation and then hit the Delete key.
Is red the only colour for annotations?
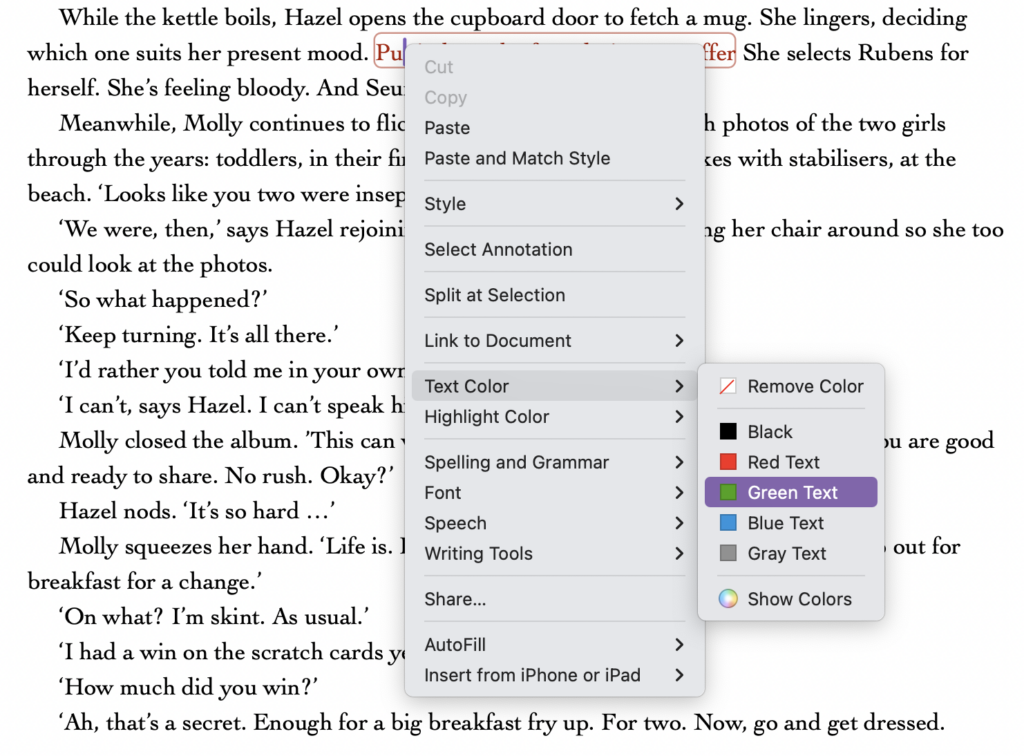
No! Because Scrivener treats annotations just like text, you can choose whatever colour you wish for the text within the annotation bubble.
Right click anywhere within the annotation bubble and then choose Text Color … and then make your choice.
What happens to annotations when exporting to the page?
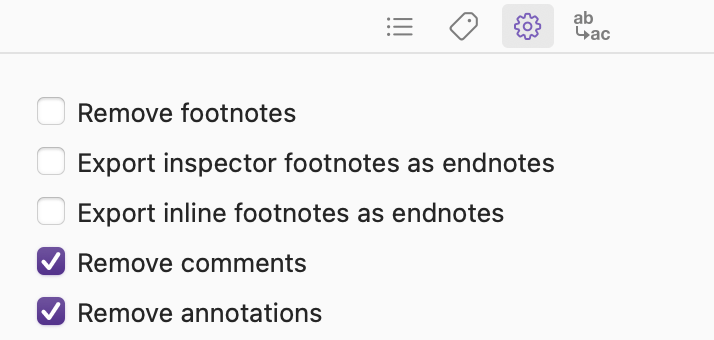
It’s up to you … You can choose not to output the annotations.
However, if you want the annotations to be visible, and this might be useful when you are mid-edit, simply make sure the ‘Remove annotations’ is unticked, and then, within the Footnotes & Comments tab within the Compilation Options dialogue box, choose how you’d like to see the annotations..
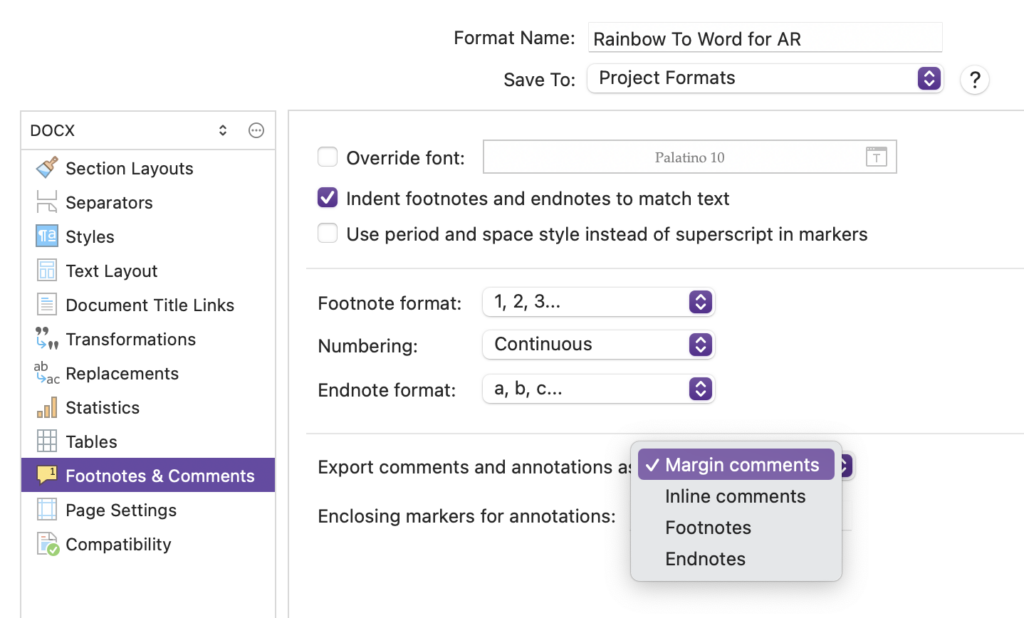
Note that the spacing either side of your annotation will remain, even if you export without the annotation. So, be careful not to insert additional spacing either side of your messages.
Questions about Scrivener?
Need a helping hand? Want a demo?
Book a Simply Scrivener Special session at a time to suit you.
And, if you need a steer on self-editing,
check out my RedPen Editing courses.
Join RedPen Editing for a free 5-day editing taster course.
Did you notice?
No adverts.
An uninterrupted read.
To thank me for posting this blog
and helping you, you could always
buy me a virtual cup of coffee!
The ScrivenerVirgin blog is a journey of discovery
To subscribe to this blog, a step-by-step exploration
of how Scrivener can change how a writer writes, click here.
Also … check out the Scrivener Tips
on my ScrivenerVirgin Facebook page.


No Comments