5 Top Tips Why use Scrivener for your blog?

If you’ve never considered using Scrivener for writing your blog post, think again!
Scrivener is not just for novel writing; I use Scrivener for EVERYTHING, especially for my blog and social media engagement.
Here are my 5 top reasons why.
1: All in one place
I have just one file for each writing project. Neat. Tidy.
There’s one for my RedPen book: EDITING The RedPen Way: 10 steps to successful self-editing – and one for each of the three follow up books: The BIG Picture, The Devil in the Detail, and Spotlight on Style.
 Be it a book, or a series RedPen Editing tips, or Scrivener tips, or the emails for my marketing campaigns, or my series of blog posts, Scrivener is where I have everything that belongs to that project, in the one place.
So, within a single Scrivener project file, I have – at my fingertips – the complete archive of my ScrivenerVirgin blog activity, plus my work-in-progress and all my research material. Perfect!
2: I choose my workspace
On my main screen, Scrivener offers an overview of the project.
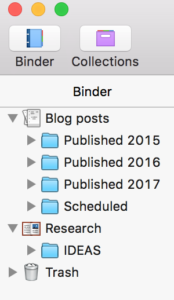
- The Binder panel sits to the left of my screen, the main folder being the Blog posts and below that, my Research folder.
- In the middle, I have my Editing pane with a choice of three options: Scrivenings, Corkboard and Outliner.
- To the right, I have the Inspector.
When I’m working on a new blog post, I split the editing screen vertically so that I can view the one I’m writing, at the same time as previous blogs in the same series. I’m aiming for continuity, so I need to have both editing panes in view at the same time.
If I want, I can dive into composition mode, which clears the screen of everything but the piece I am writing. No distractions. Ideal writing conditions. Do you like my choice of background?
3: I am free to write how I like
I never write anything in the order in which it is published. That’s just how I work. You might call it unstructured; I call it spontaneous!
For my blog posts, an idea comes, and I develop it and, only when it’s fully formed is it moved to the blog schedule. Meantime, it sits in a folder entitled ‘IDEAS’ within the Research folder in my SV blog project file.
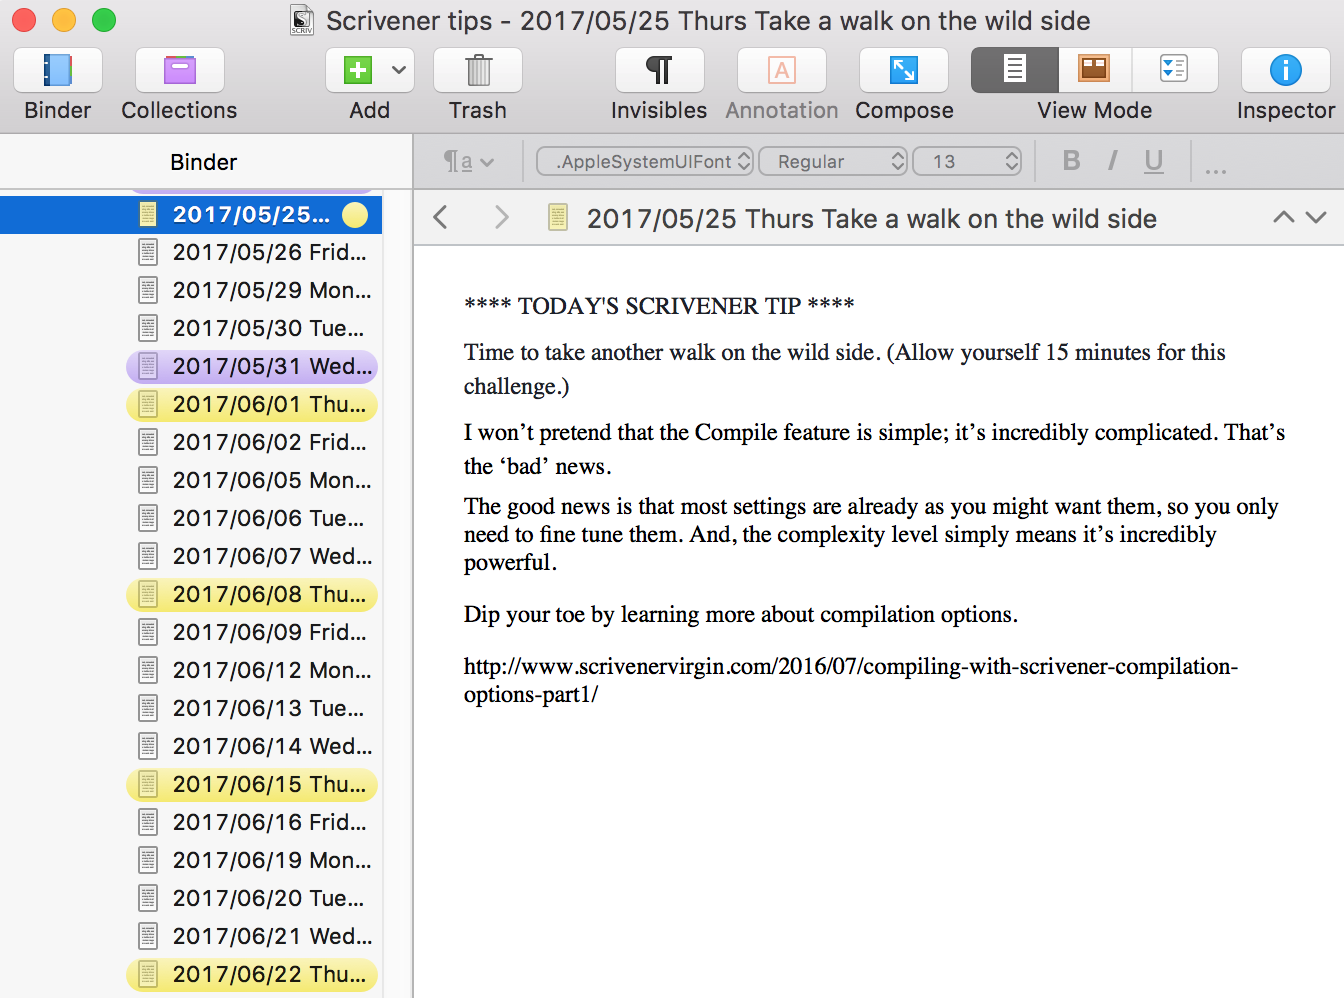
The same strategy goes for the series of RedPen Editing tips and Scrivener tips. They are themed, and I tend to write one theme at a time. For example, I’ve just completed a series of tips on a Thursday – the walk on the wild side.

The yellow colouring indicates I’ve written and scheduled these tips.
This facility to capture ideas whenever they come to me means I also have one Scrivener project file – called Inspiration – full of ideas yet to be developed! Another play. Another novel.
When I’m ready to work on them, I’ll drag the material out of my Inspiration project file into a brand new Scrivener file set up for the new project.
4: Loads of support
Learning how to use a sophisticated piece of software like Scrivener takes time and energy and, if you are like me, both can be in short supply.
It’s not just knowing what every item on every menu does, it’s also appreciating how this magnificent software, with all its buttons and bells, might help a writer – like you and me – to achieve what we need to do.
There’s an abundance of support: Literature & Latte’s support options and their Scrivener Manual; online videos and tutorials; courses from The ScrivenerCoach Joseph Michael and Scrivener expert Gwen Hernandez.
I’ve even become part of that support system myself. Book a Simply Scrivener Special for one-on-one help.
5: I set my goals and I achieve them
I started using Scrivener ahead of NaNoWriMo 2015.
Knowing that I wanted to write at least 50K words during that November when I created my outline, I set word targets for each scene. When I started writing, the Outliner showed my progress and it was colour coded. I also set a daily target. There were no excuses for falling behind schedule!
It’s the same for my blog posts. I have a target word count. I write enough to meet that word count.
If a post warrants more words, I’ll think about splitting it up. Next thing I know: I have a series in the making.
So, if you are not yet using Scrivener, get your copy now?
All the material published on my website is free, and the RedPen Newsletters too. But, ScrivenerVirgin / RedPen is also a business and my livelihood. So, for some – not all – of the stars mentioned in my blog posts, and on my Recommendations page, I am an affiliate. That means, if you purchase a product having clicked a link through my site, I may earn a commission on any sales that follow. You pay no more than you normally would! And, you help me to offset the costs in providing my free webinars. I only share links – and direct you to them – if I believe these guys can really deliver, and they do.
The ScrivenerVirgin blog is a journey of discovery:
a step-by-step exploration of how Scrivener can change how a writer writes.
To subscribe to this blog, click here.
Also … checkout the Scrivener Tips
on my ScrivenerVirgin Facebook page.


Theresa Hupp
16 March 2018 at 20:12I have been using Scrivener for the two blogs I write since the middle of 2014. It’s wonderful! I draft each post as a separate document in Scrivener, and I title them with the date and title of the post. I file them by month. I also use the metadata field to color code the posts by topic, so I can see how frequently I write on each of my major topics.
I don’t keep the images I use with each post in Scrivener. I suppose I could, but Scrivener doesn’t seem to deal well with images. (At least Scrivener for Windows 1.9 doesn’t.)
I now have 3.5 years worth of posts. I keep thinking I’ll compile some of them into ebooks, but that’s a future project.
Thanks for your information on Scrivener. I learn something new about it from every source. And I’m eagerly awaiting Scrivener for Windows 3.0.